Recommended
9 best bug tracking tools for catching app defects on time
There are many different ways to approach bug tracking in software development.
However, among them, one solution stands out as a go-to option for many companies worldwide―Jira.
This highly popular platform has made a name for itself by simplifying bug management with unparalleled ease.
Boasting outstanding customization capabilities, Jira is not only able to handle bugs but also facilitates seamless integration with a whole host of other tools, streamlining the entire bug-tracking process even further.
Without further ado, let’s delve into the best practices for unlocking Jira’s full potential and optimizing your bug-tracking process.
Table of Contents
When Jira was originally built, it was intended to be used as a bug-tracking tool.
That’s why it’s no surprise that the platform is packed with many options for building workflows that address tracking bugs.
Let’s make this process more specific and start by showing you how to design a basic workflow in Jira.
The first thing you might do is to create an issue, which serves as a task. The issue will receive a To do status.
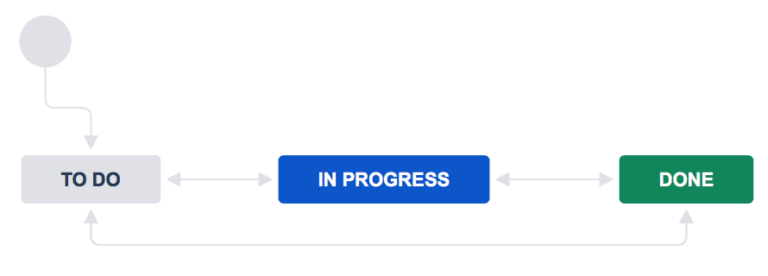
Once work begins on that issue, you can change its status to In progress. When the task is completed, you simply click on the Done button to mark it as such.
As you can see, creating a workflow in Jira is not only easy but also gives you complete control over how a bug moves through the stages in your processes.
However, this Jira’s standard workflow might be sufficient for smaller projects.

Get unreal data to fix real issues in your app & web.
Nevertheless, once a project becomes more complex and starts requiring multiple people, approval levels, or intricate tasks to complete, more than Jira’s standard workflow might be required.
That is where custom workflows come into play.
Luckily, Jira is one of the most customizable issue-tracking tools out there, which means you can build more elaborate workflows for your scenario, as shown in the example below.
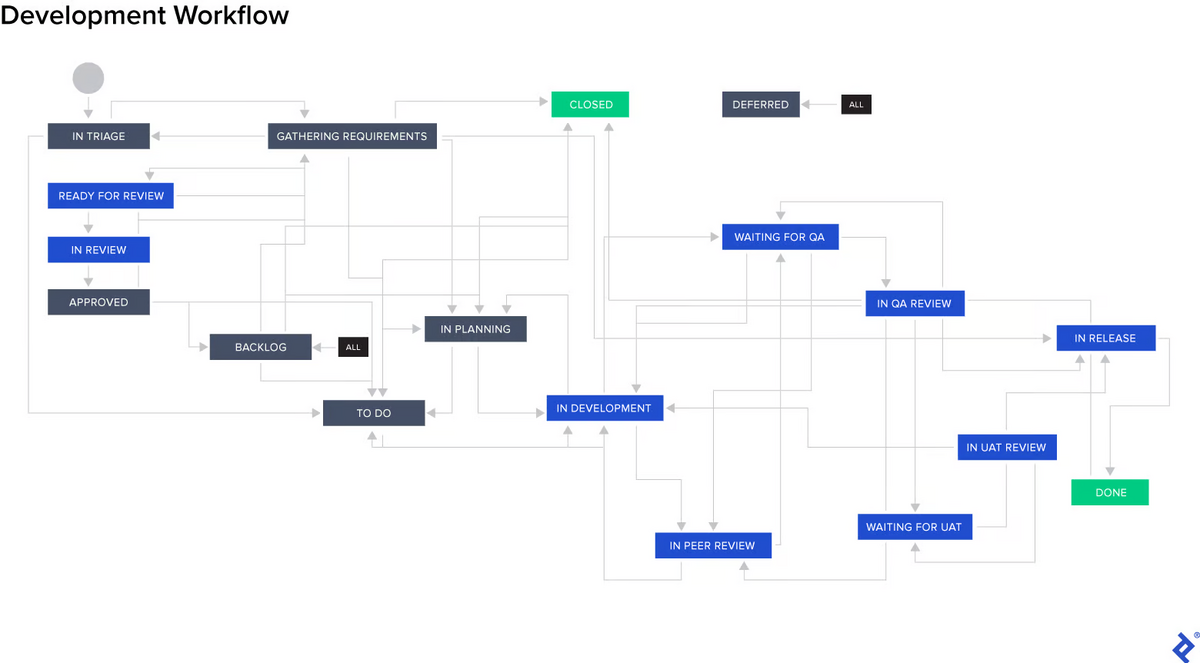
As in the image, you can add custom steps, such as In planning, Ready for review, In review, Approved, In peer review, and Waiting for QA.
Or you can add whatever else you find relevant to the needs of your project―the bottom line is that Jira allows for extensive customization.
All in all, with the right workflow, you’ll be able to keep tabs on your bugs and make sure that no critical defect gets lost in the shuffle.
An issue in Jira doesn’t necessarily mean that a problem exists.
It encompasses any event or circumstance that requires team members to take some action—even if it’s not a problem per se.
That’s why, when creating new projects, it’s necessary to categorize the issues appropriately.
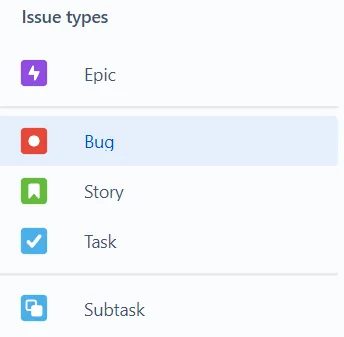
When it comes to software development, Jira has predefined default issue types you can choose from. Those are as follows:
Choosing your preferred option is pretty straightforward. All you have to do is select it from the dropdown menu, as this image clearly shows.
This system of categorization ensures that different issues are collated under different categories, facilitating more effective and swift management and resolution.
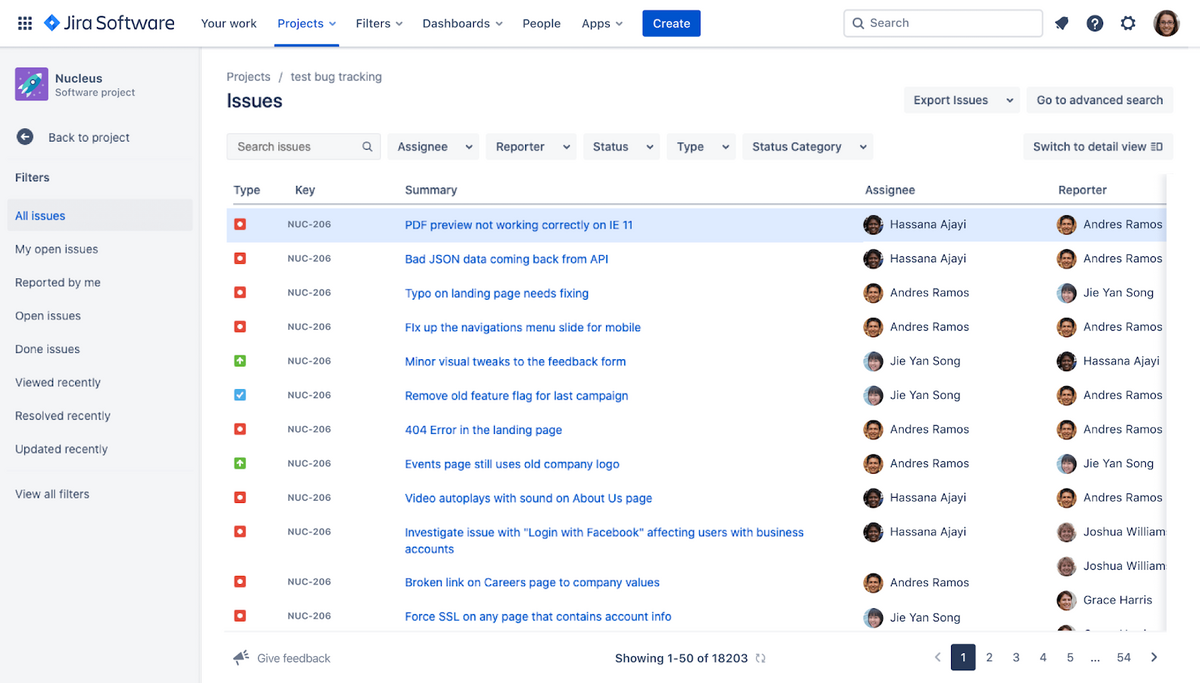
When it comes to bugs, it enables you to keep track of the number of bugs and their severity.
You can also filter through bugs to identify if there are multiple software areas or even projects with similar bugs and decide which one takes precedence.
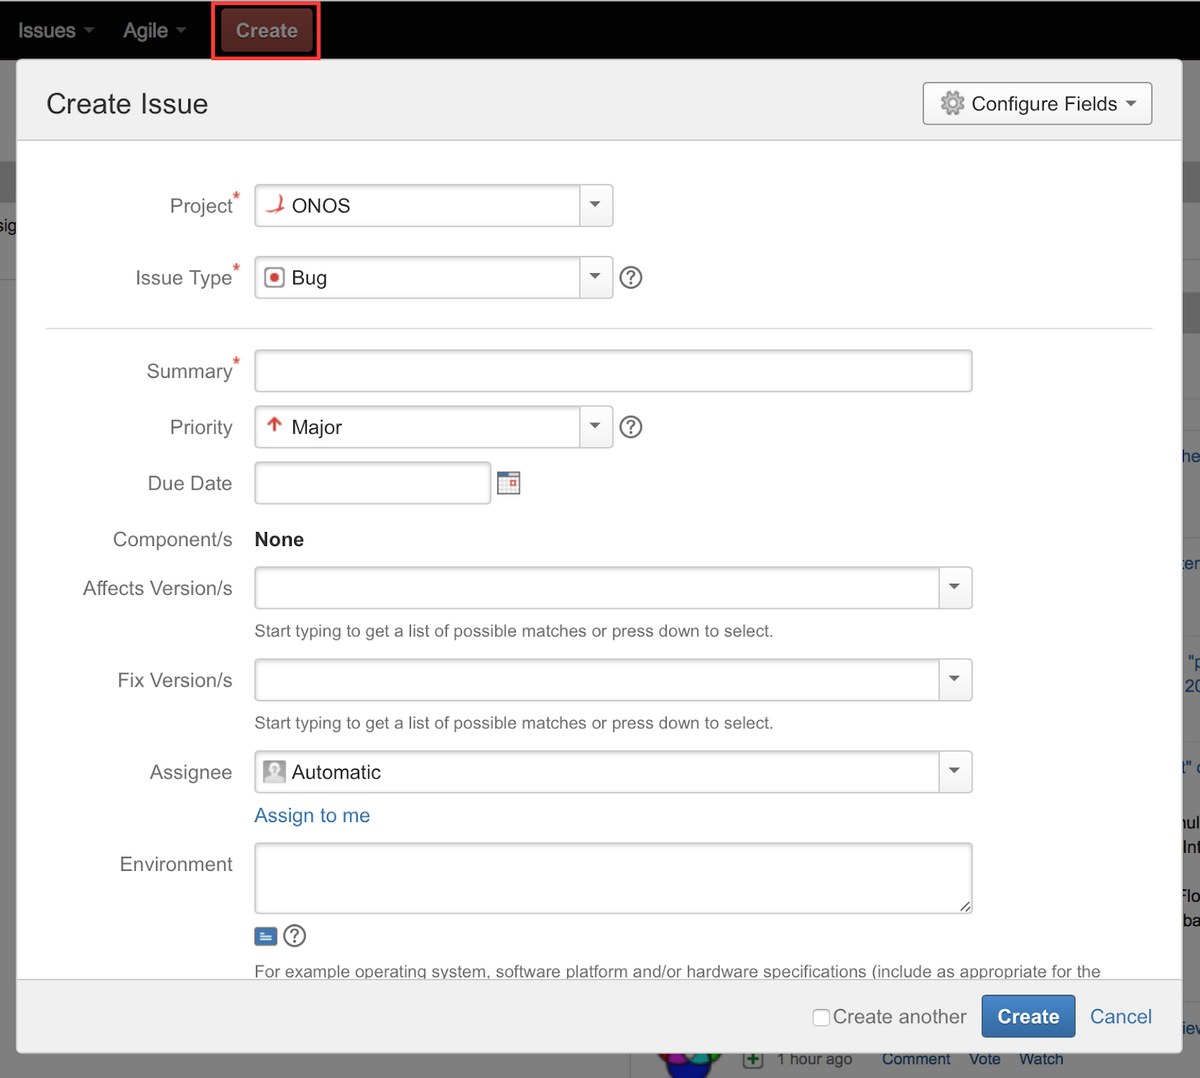
At this point, it also has to be noted that categorization doesn’t stop here because each of Jira’s issue types can have its own set of attributes, thanks to designated fields.
You can add as many fields as needed for the particular issue type you are working on, but most bug-related issues contain:
The ID number is automatically generated by Jira and represents a unique identifier for each issue.
The summary is a brief description of the problem, while the description provides more details about the bug itself.
Priority indicates how important it is to fix this bug, while the environment refers to conditions in which the bug occurred, such as the OS version, browser, device manufacturer, app version, screen orientation, network connectivity, and so on.
Next, attachments can contain any relevant files that provide more information about the issue at hand, such as screenshots, video recordings, or console logs.
The assignee is usually one of your team members who takes responsibility for this particular issue.
Finally, the status indicates whether an issue is recently flagged (new), being worked on (in progress), or completed (done).
In other words, these fields can contain a wide range of information about the very nature of the bug itself and who is responsible for fixing it.
With this information, you and your team members can access all the necessary information relevant to a given bug when it’s time to fix it.
While using Jira to shape workflows and categorize issues can be a commendable start to ensure your bug-tracking system remains organized, taking it up a notch and creating links between bugs that share some sort of correlation can deliver benefits beyond the ordinary.
But what precisely does it mean to create links between bugs?
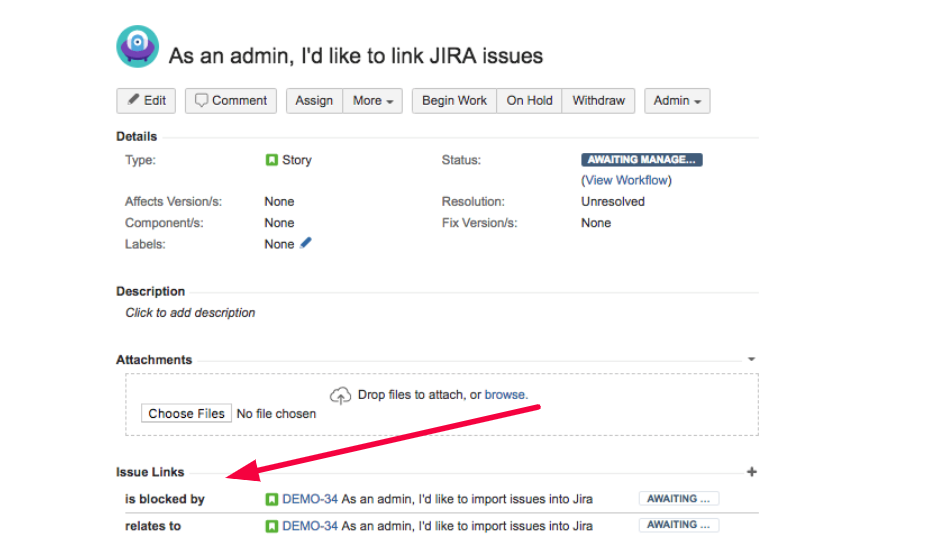
In Jira, you have the option to specify the nature of the relationship between bugs.
For instance, you can indicate if a bug relates to, blocks or is blocked by, duplicates or is duplicated by, clones or is cloned by, and causes or is caused by another bug.
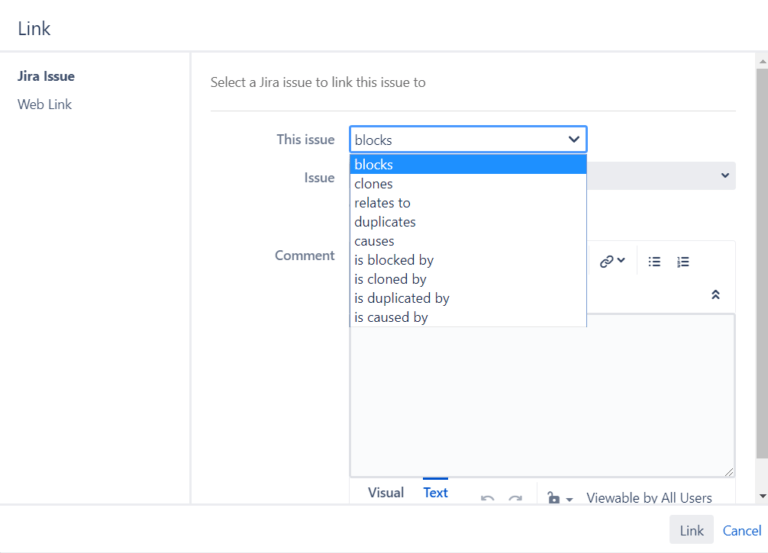
This level of specificity can be invaluable in helping you track down and fix bugs.
You can use this information to establish a clear chain of events that will enable you to pinpoint issues more quickly and accurately.
You may have, for example, several bugs that are connected to the same underlying cause, but each necessitates a different fix due to its unique symptoms.
One bug can also be blocked by another bug, which means that you can’t fix the former until you’ve fixed the latter.
Another perk of linking bugs is that it can help you avoid duplicate issues. Instead, you can merge their reports into one single issue, avoiding redundancy.
Also, you can spot patterns in bug reports and better grasp how individual bugs impact other areas of your software.
Without linking these bugs, it’s easy to get muddled in the minutiae and lose sight of the big picture.
However, by establishing a connection between them, you can see how they’re interrelated and tackle the root of the problem more efficiently.
When you’re collaborating on a bug-tracking project with your team members, it’s important that everyone stays current.
Jira has one indispensable feature that can help you in this area―email notifications.
In other words, Jira can be configured to notify you and the rest of your team via email when changes are made or new bugs have been added.
This way, you can stay updated on the bug’s status without having to keep checking its progress in the tool itself.
Jira supports many standard email notifications, and the following are just a few of the most common ones:
Nevertheless, just the thought of getting all those messages in your inbox whenever a change is made can be overwhelming.
Fortunately, you can customize some of Jira’s notification preferences to control which messages you receive.
Capture, Annotate & Share in Seconds with our Free Chrome Extension!
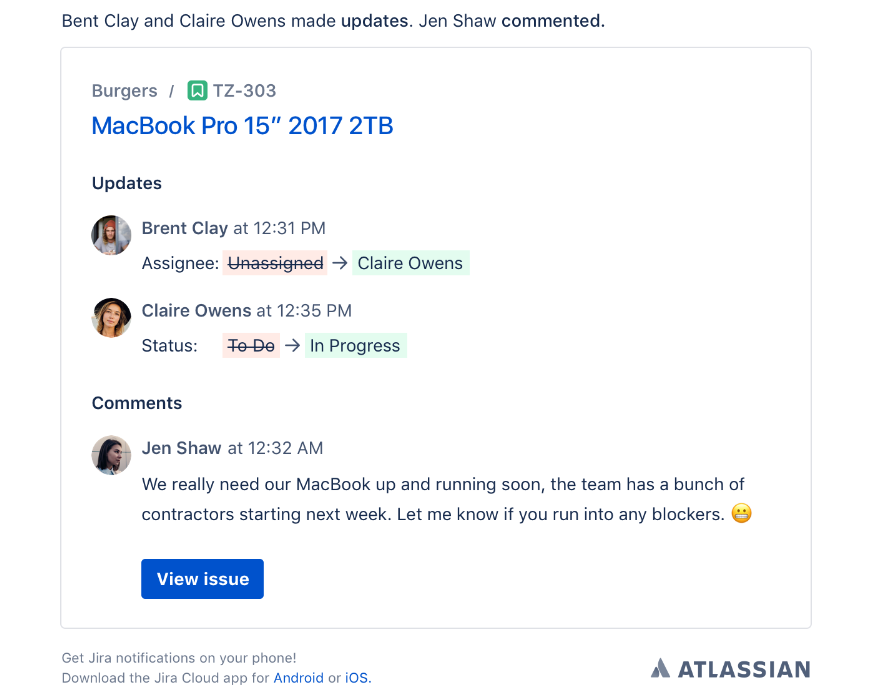
Another nifty feature that Jira offers is the ability to consolidate individual changes and updates into one summary email.
This way, your inbox won’t be flooded with emails regarding every single bug that is added, edited, or resolved during the day.
Instead, you’ll receive a single email that includes more than one change made to your project.
Here is an example of such an email:
Another important factor to consider is who will receive emails for the updates and changes.
Email notifications are set to go out automatically to anyone who is watching the bug, is the reporter, or is assigned to it—as well as those who have been explicitly mentioned.
You can customize your preferences here, too, so that team members only receive updates relevant to their role in the project.

You can see in the image above that you can set up to receive an email when someone @mentions you, but not when you are a reporter, for instance.
To customize your preferences, you simply check or uncheck them in the settings.
When all is said and done, setting up notifications in Jira is a practice you should employ because it keeps everyone in the loop and increases collaboration and accountability in your team.
And that is something worth considering.
One of Jira’s standout strengths is its ability to integrate with a wide array of popular tools and services such as Slack, GitHub, Jenkins, or Zapier.
For instance, Slack is a communication tool that is widely used today in almost every industry and whose usefulness has been recognized by many teams worldwide.
When integrated with Jira, you’ll receive automatic updates in your Slack channel whenever a new issue is created, edited, or resolved.

This helps you stay on top of things without having to switch between tabs and platforms constantly.
Also, you can integrate Jira with bug and crash-reporting tools.
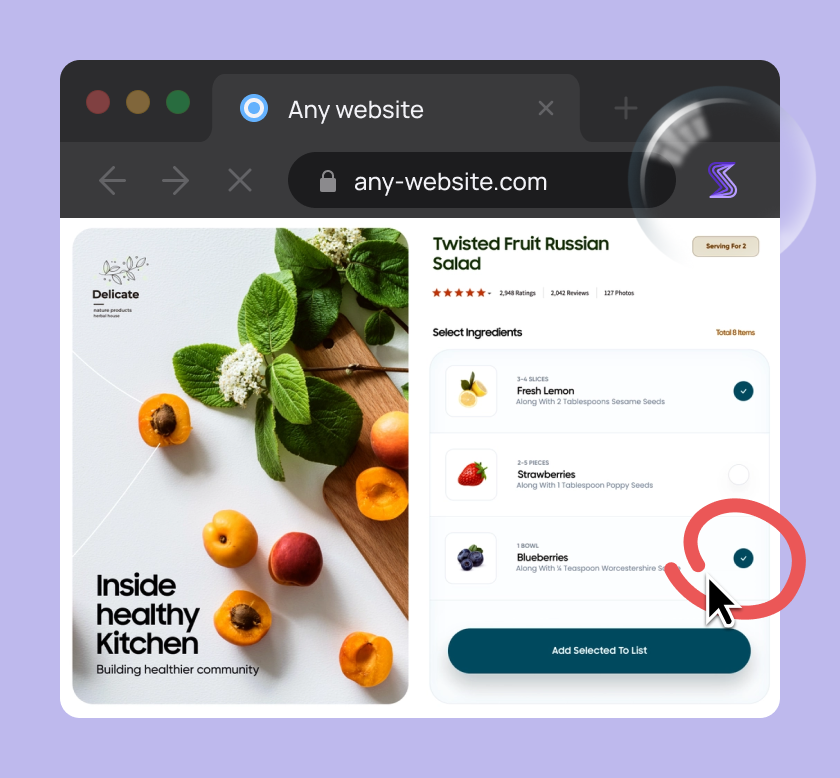
Let’s take our tool Shake as an example.
Shake can be installed on any iOS or Android device to facilitate the process of detecting and reporting bugs.

When testers spot the bug in the app they are testing, all they have to do is shake the device and Shake will automatically collect more than 70 pieces of information about the bug, including the following:
This is possible because Shake, just like airplanes, has its own black box, meaning that it can record a complete environment profile and give you an inside scoop into what happened 60 seconds before the bug was reported.
As Shake can be easily integrated with Jira, it’ll then send this report automatically to Jira’s dashboard, where all involved parties, from developers and testers, to project managers, will be able to inspect it and begin the process of resolving it.
As you can see, a combination of a quality bug-reporting tool such as Shake and a powerful issue-tracking software such as Jira can do wonders when it comes to managing bugs.
Therefore, Jira is not only a great tool for tracking bugs—its robust set of integrations allows you to automate the entire bug-reporting process.
That’s why it’s worthwhile to periodically browse the Jira integration page and peruse if there are other tools that might help you further streamline your bug-tracking efforts.
Jira software provides a powerful and flexible bug-tracking system that can help you streamline the development and testing process and improve collaboration.
This includes setting up clear workflows, using relevant issue types and fields, linking bugs effectively, establishing a proper notification system, and selecting appropriate integrations.
With these practices in place, you and your team can identify, track, and resolve bugs efficiently, ultimately leading to better software products and happier customers.
From internal bug reporting to production and customer support, our all-in-one SDK gets you all the right clues to fix issues in your mobile app and website.
We love to think it makes CTOs life easier, QA tester’s reports better and dev’s coding faster. If you agree that user feedback is key – Shake is your door lock.
Read more about us here.

Add to app in minutes

Doesn’t affect app speed

GDPR & CCPA compliant

Unexpected things pop up
Just like bugs in your app or web 🐛 Fix them now with just one reporting tool.