Recommended
Best practices for bug tracking in Jira software
Atlassian’s Jira is a versatile project management tool that is also used for bug tracking and quality assurance.
In addition to standard best practices for bug tracking in Jira, there are additional ways in which you can get more out of the tool.
Mainly, following a consistent procedure when it comes to reporting and tracking bugs will help you with bug fixing, which is the ultimate goal in QA.
So, if you want to learn about the optimal method for building reports and tracking bugs in Jira, this article is for you.
We’ll walk you through the entire process and show you how to set up Jira to work in your favor.
Here we go!
Table of Contents
Let’s assume that you’ve set up your project, and now it’s time to get down to business. To build a bug-tracking report in Jira, you need to start by creating a new issue.
Jira supports different types of issues, whose purpose is to help you distinguish and categorize your team’s work within your Jira site. The default issue types are epic, bug, story, and task.

As you’re building a bug-tracking report, you should select bug as your issue type.
Depending on your QA needs, you can introduce new issue types if you don’t think that the default ones are distinctive enough.
Jira also lets you customize issue types. For instance, you can increase the issue type visibility by choosing a different icon or even importing your own image.
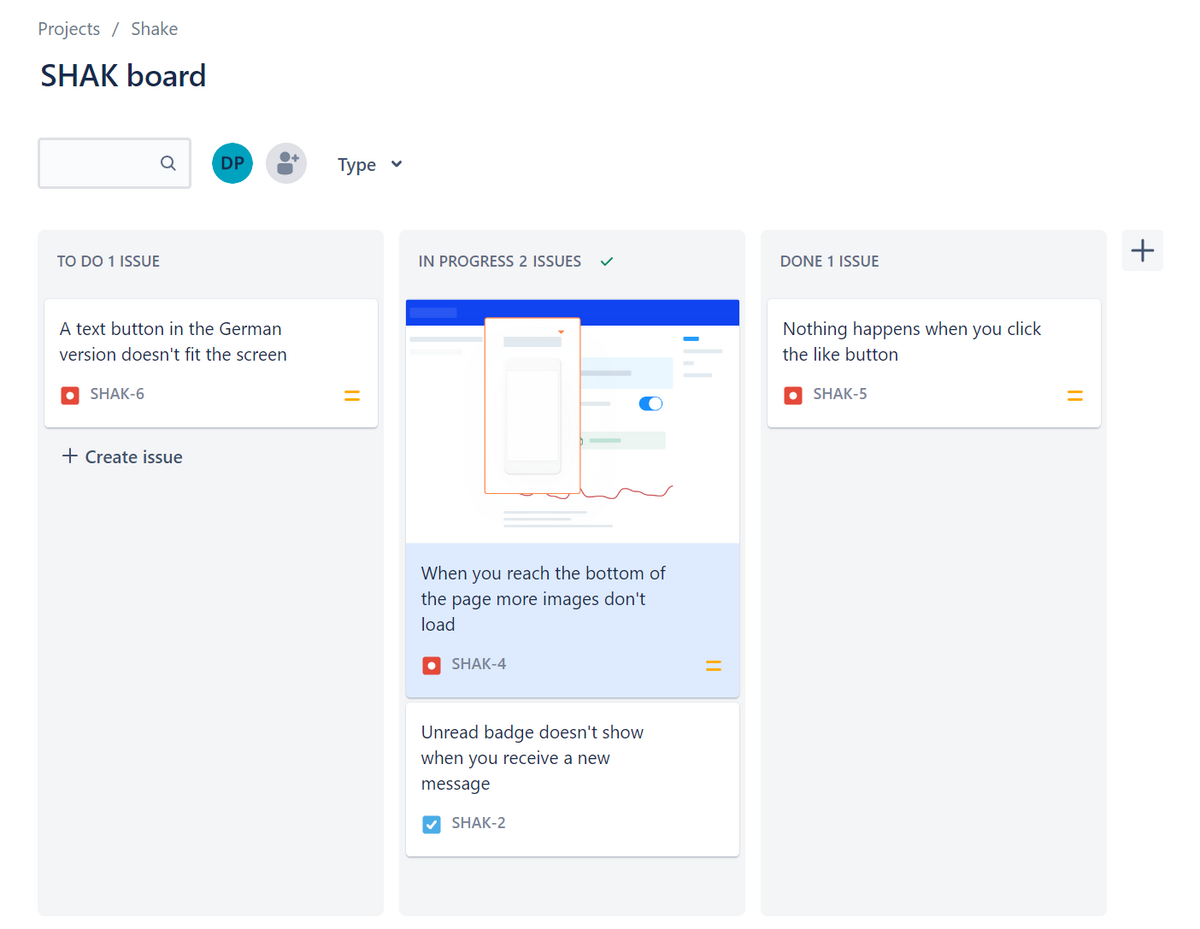
Now that you’ve familiarized yourself with issue types, it’s time to proceed to recording your first bug. So, go to your project’s board, click the Create issue button, and mark it as a bug.

Get unreal data to fix real issues in your app & web.
This is an essential step that you should never skip because categorizing issues by type will allow you to have an overview of all bugs in the project at all times.
To make this tutorial easier to follow, we’ll track imaginary bugs in an equally fictitious image-sharing app. You can see an example of adding a bug below.
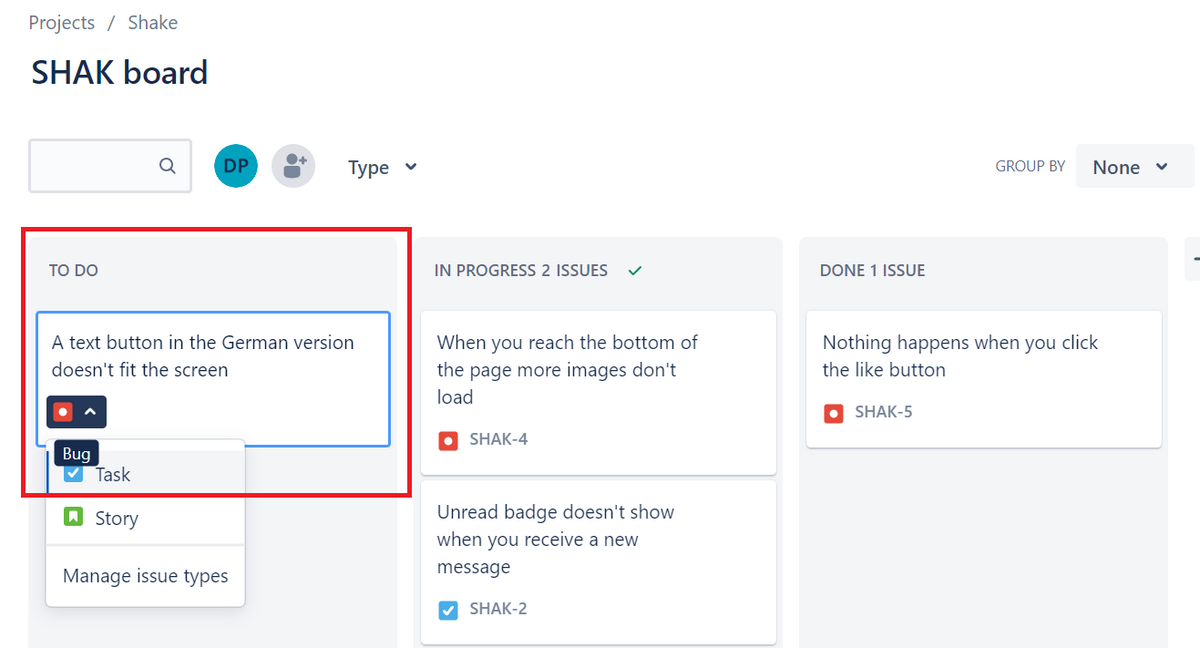
And that’s it for creating a new issue!
You’ve done the fundamental step, and now adding more details to the bug report is in order.
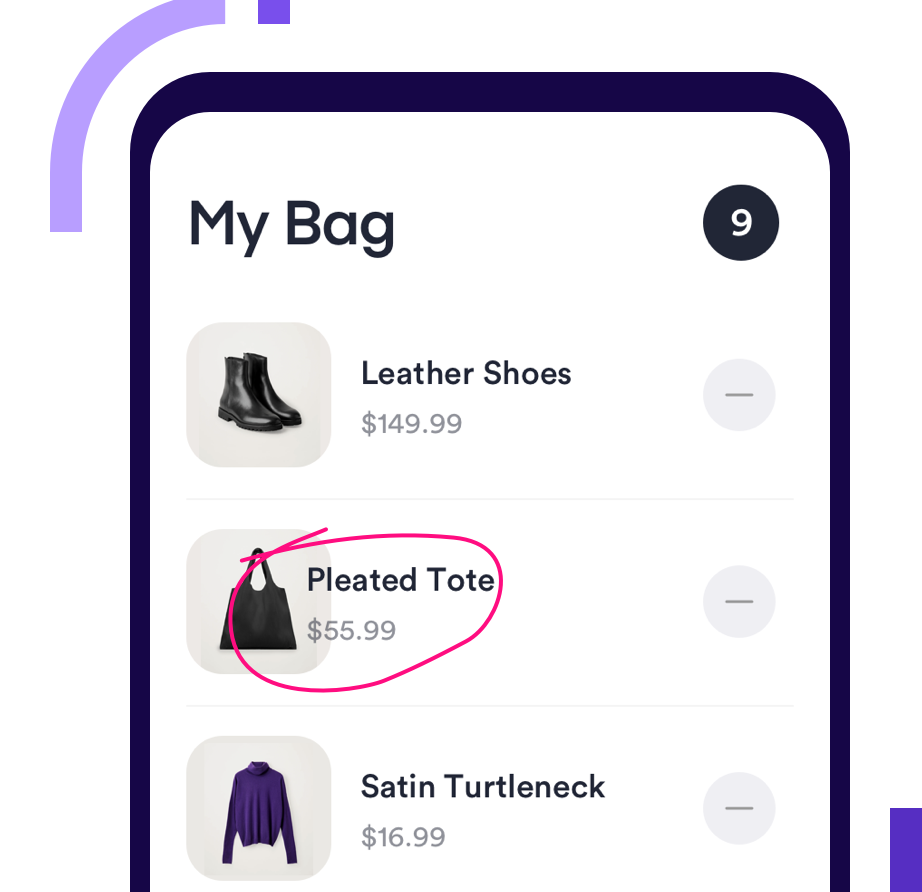
Take a look at the screenshot of an in-app shopping cart below.
You’ll immediately notice a glaring bug there without much effort.
However, if you were to record the bug as “there’s a bug in the shopping cart”, your Jira ticket wouldn’t be informative nor helpful to developers whose job is to fix said bug.
Because of that, the second step of creating a bug-tracking report is describing the bug in more detail.
If there is no bug description, developers dealing with the bug have to search for the bug and document it themselves.
That leads to duplicate work and probably grunts and sighs coming from the devs as well.
So, for the sake of development efficiency, testers should accompany each bug they report with a description. Here’s how we did it in our example.
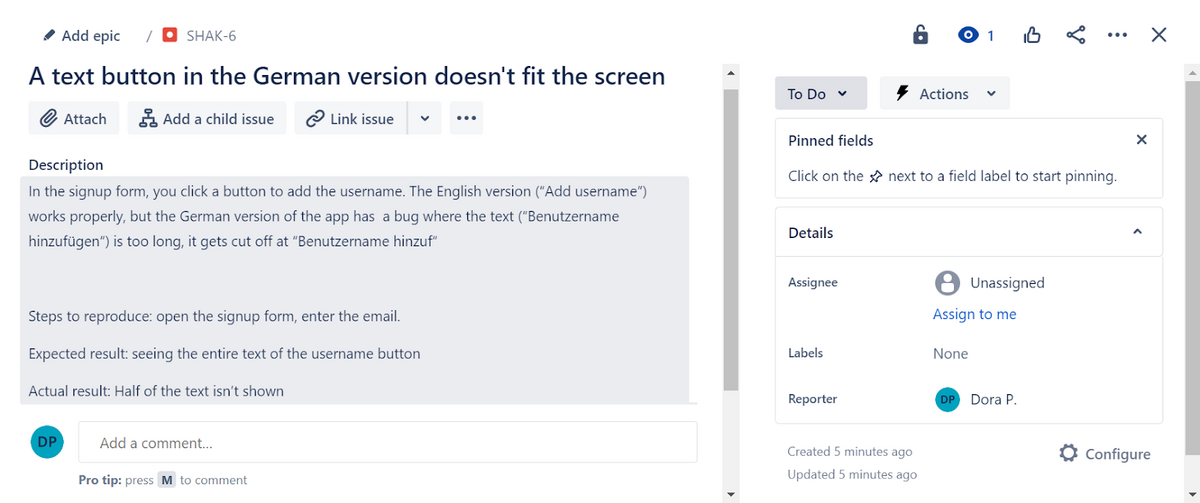
As you can see, the essential info about the bug is visible from the title of the issue, and the text in the description box provides more details about it.
There are also steps needed to reproduce the bug, expected results, and the results that actually happened.
Such details are of crucial importance for the person fixing the bug, so make sure that you include them in each Jira bug ticket.
After you’ve described what the bug is about, your next step is to select the bug priority.
Bugs are not resolved using the first come, first served principle.
Instead, the bugs that are high in severity should be prioritized, while the ones that don’t impact the performance of the app can wait, even if they’ve been discovered earlier.
So, when you detect a bug, you should perform the triage, decide on the bug priority, and enter it into Jira.
Jira’s default priority settings come in five degrees, ranging from highest to lowest.
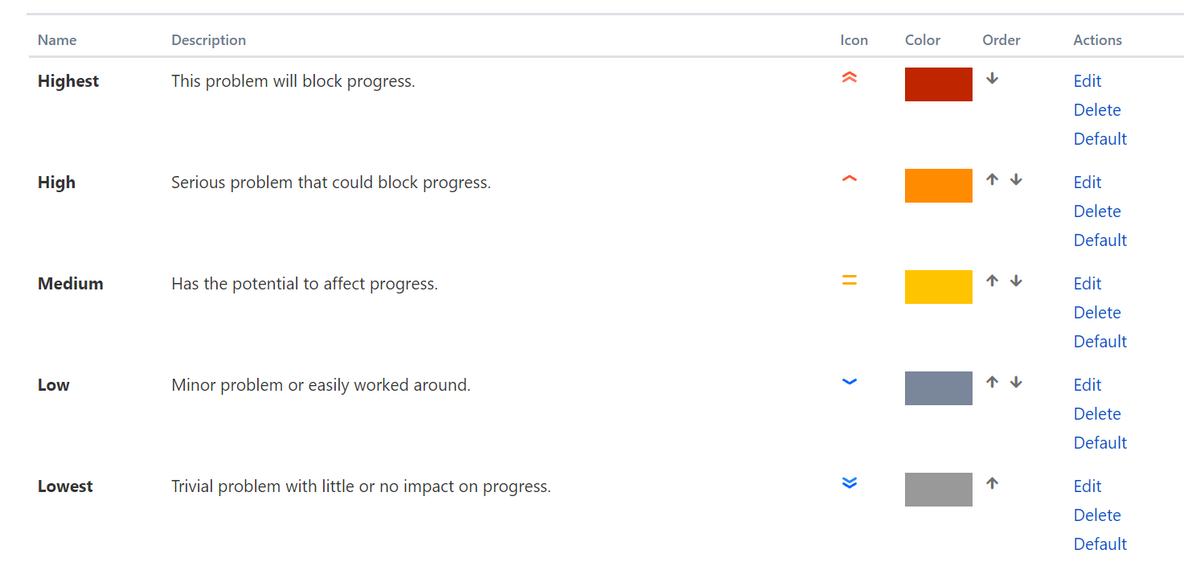
Jira is a customizable tool, and it lets you add your own priority levels, change icons, colors, and more.
If you’re working on a new project in Jira, bear in mind that prioritization settings won’t automatically appear when you open a new issue.
Here’s the path you have to follow to enable prioritization:
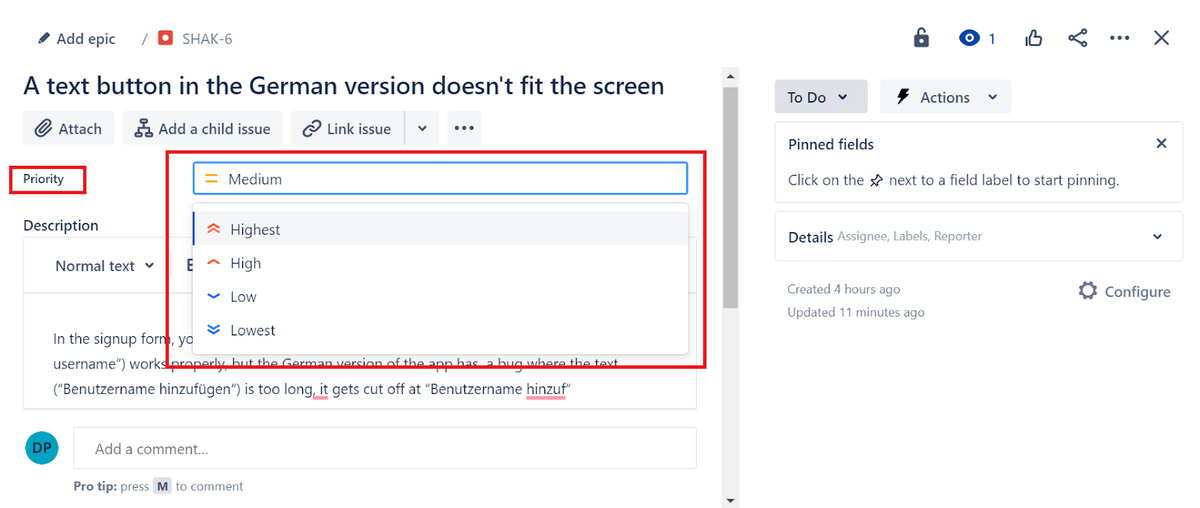
You’ll now be able to select a priority from the dropdown menu for each new bug you open within the project, like this.
Admittedly, enabling prioritization in Jira does take an additional minute and may seem like an annoying extra step when you’re just trying to report bugs.
However, the ability to assign priority to bugs will help developers make better decisions when choosing the next bug to resolve, making the entire process run more smoothly, so the setup is worth it.
Bugs don’t behave the same way across different devices or versions of the app.
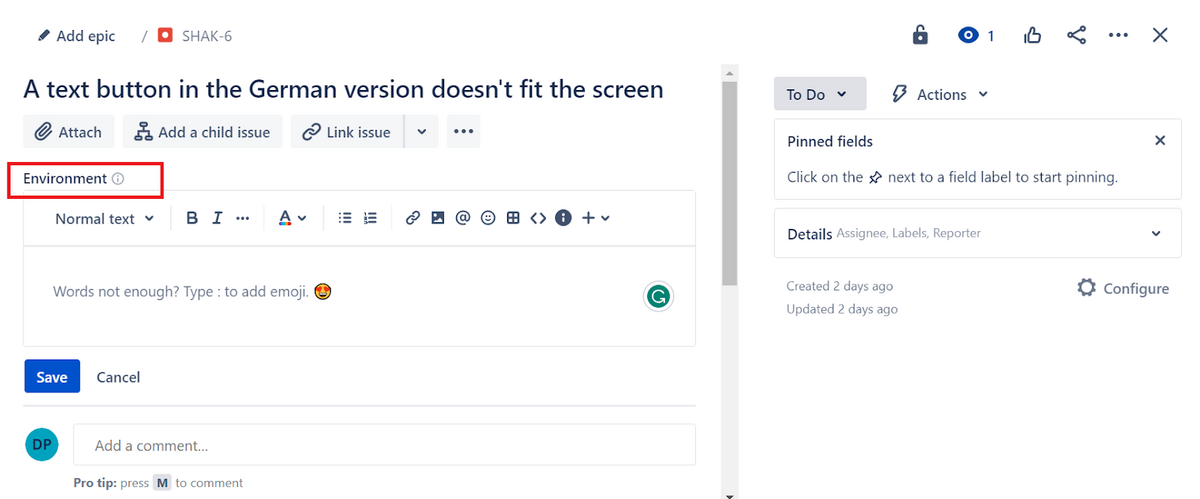
That’s why you should describe in which conditions the bug has occurred, i.e., add environment information to Jira bug tickets.
The environment information allows developers to replicate that environment and reproduce the bug so that they can continue fixing it.
The image below shows a good example of an environment description in a Jira bug ticket.
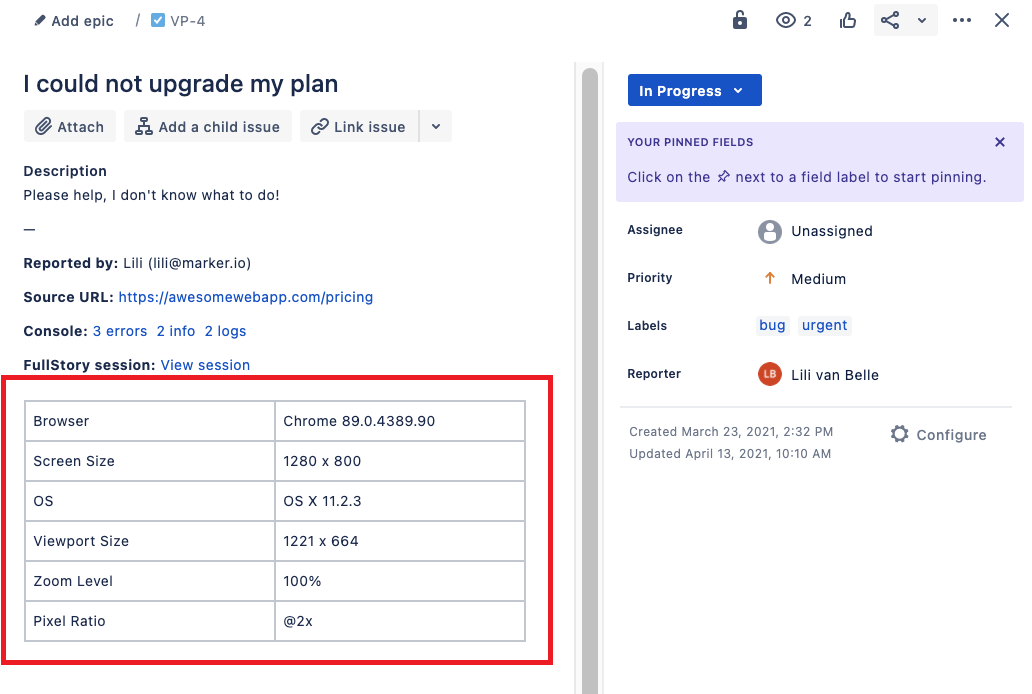
The report contains the environment details such as browser, screen size, OS, viewport size, and more.
Although Jira lets you add the environment as a dedicated field that appears in all tickets, you should note that the field doesn’t differ too much from a regular description box.
In other words, you still have to create the table with software and hardware specifications yourself.
Still, including the environment field in your bug-tracking reports can help remind your testers to include the info, ensuring that bug reports are always complete.
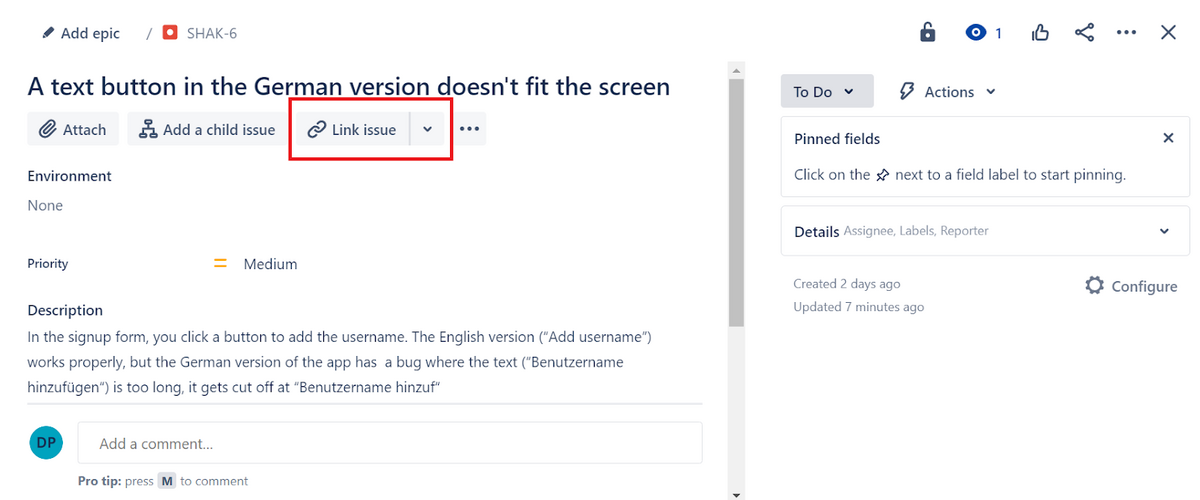
A bug isn’t always an isolated problem. For example, a bug’s resolution may depend on the resolution of another bug.
For that reason, Jira allows you to link issues together and create associations between them.
You can see the Link issue button as soon as you open an issue.
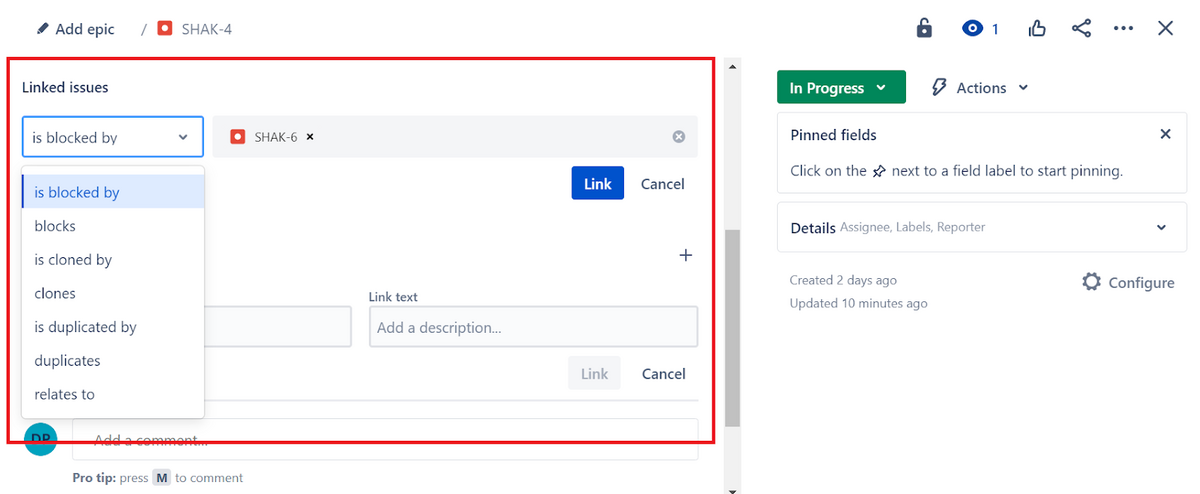
When you decide to set up an association between different bugs, you’ll be able to choose between several connection types.
So, you can open one bug, select another bug it’s linked to, and specify their relationship by choosing one of the linking types from the dropdown menu.
The links can be about bugs being blocked, cloned, or duplicated by one another.
Of course, one bug can be linked to multiple other bugs—you don’t have to limit the number of links to one.
All in all, linking bugs isn’t a compulsory step in building a bug-tracking report in Jira because not all bugs are connected to others.
But in cases when the connection between two bugs significantly impacts the resolving process, it’s helpful to be able to quickly define the relationship.
A good bug report is written clearly and concisely. And seeing as a picture paints a thousand words, is there a better way to describe a bug than with a screenshot of the bug?
Jira lets you do that rather straightforwardly: the Attach button is the first one you see when you open an issue.
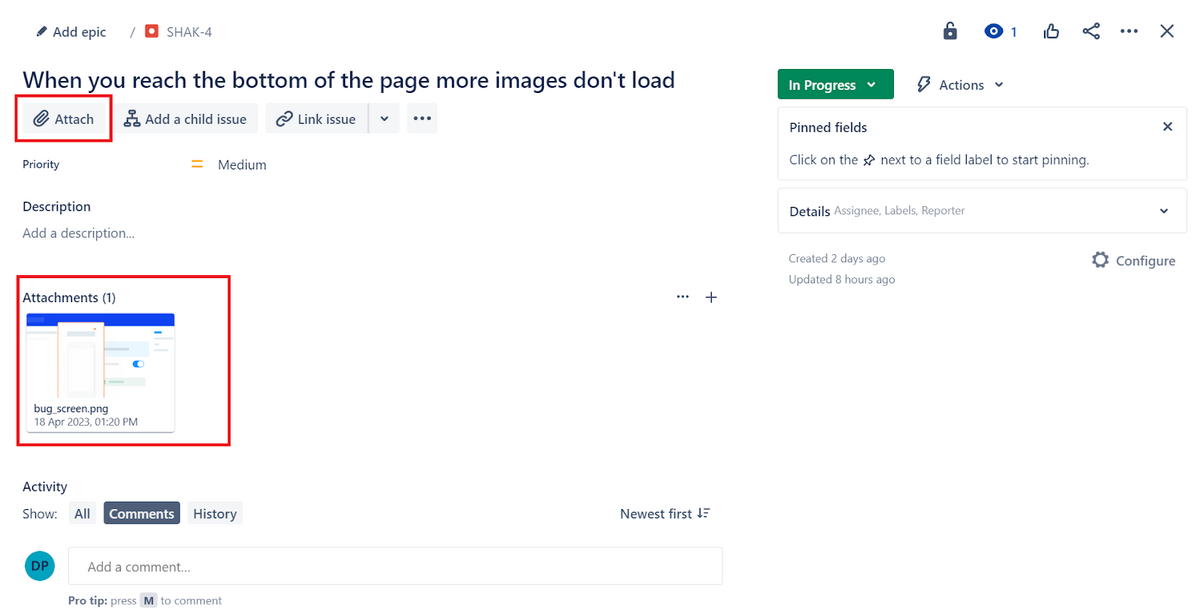
Although you can attach various types of documents, screenshots and screen recordings are the most relevant types of attachments for bug reporting.
An additional benefit of including attachments is that they allow the devs to see what an issue is about straight from the project board, without opening the ticket.
However, if you find that attachments are making your board too busy, you can open an issue, hover the mouse over the attachment, and select the Hide on card option.
This will keep the attachment within the issue, but it won’t be displayed on the board.
Both approaches are valid, it’s up to your team’s preference.
The next step in the bug-tracking process is deciding who will fix the bug.
In some companies, testers report bugs and give developers the freedom to decide which bug to start resolving.
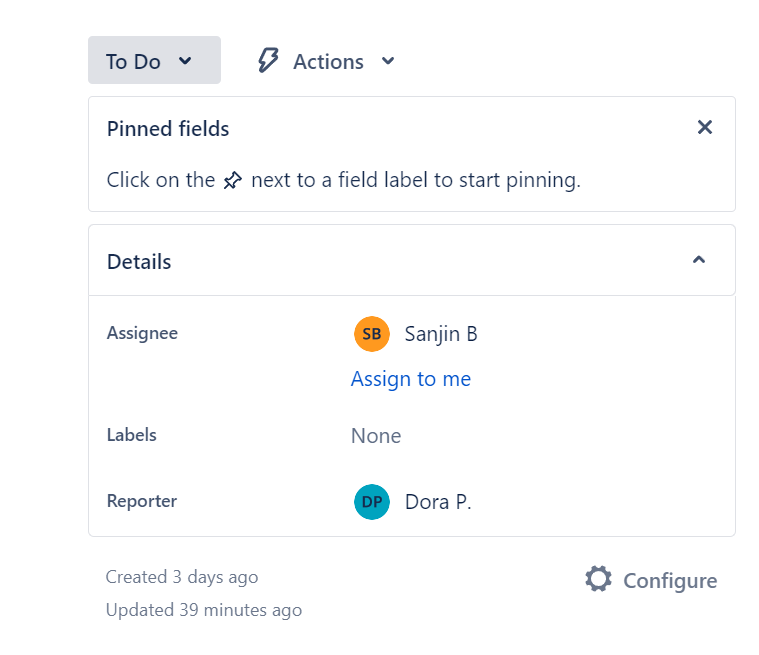
However, other companies prefer assigning developers to specific issues, which you can do in Jira with one click.
Open a ticket, select a person from your team, and you’re all set.
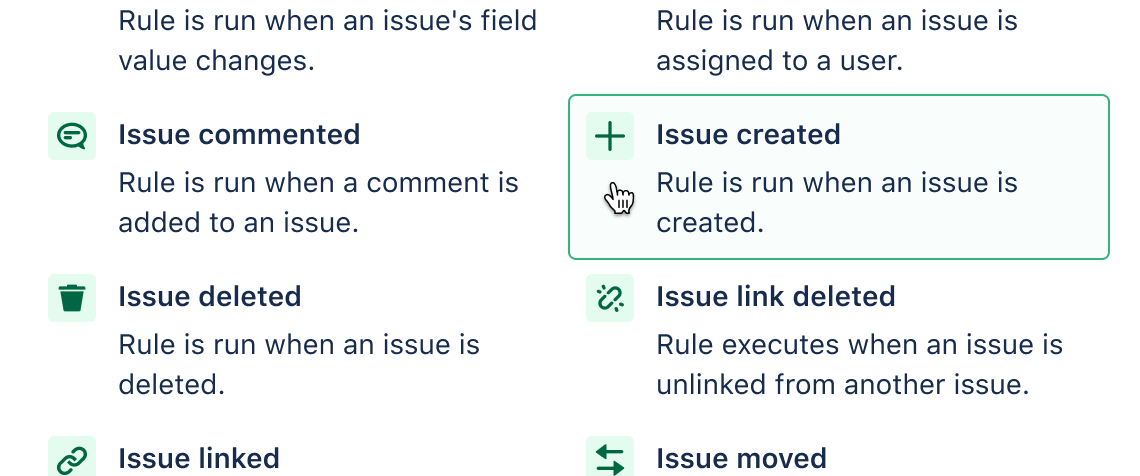
Jira also allows you to automate assigning. This requires you to set up triggers and conditions.
For instance, when a dev resolves the bug and moves it to review, Jira can automatically assign a member of the QA team to see whether the bug has been squashed.
You can set up similar triggers for different actions within issues.
So, whether you prefer a free-for-all approach to assigning issues or a more structured one, Jira has you covered.
Either way, it’s good to have an overview of who is doing what, regardless of how you’ve assigned the tasks.
Lastly, you wouldn’t want the changes of the bug moving through the workflow to go unnoticed. That’s why you should set up Jira’s notifications the way that suits your team’s needs.
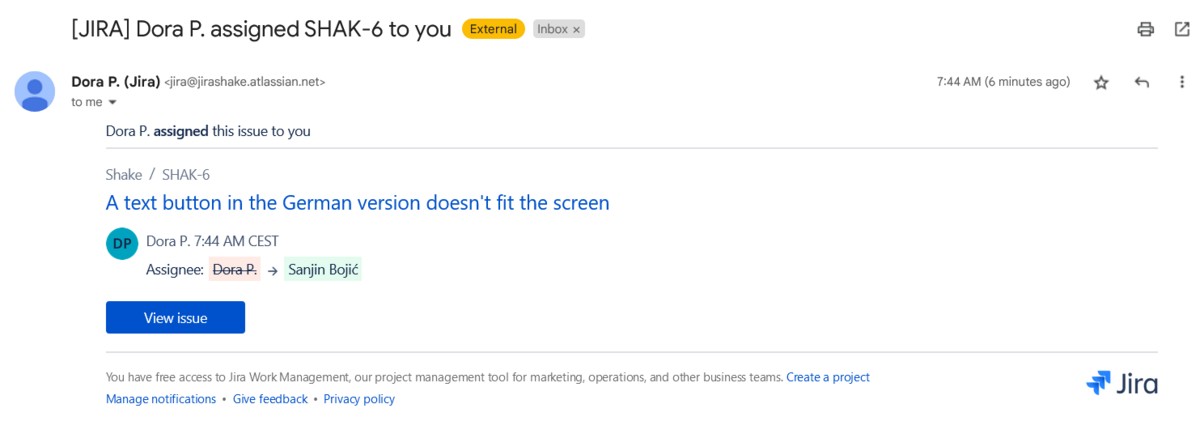
By default, Jira sends out email notifications to anyone watching the bug, to the reporter, the assignee, and to anyone that is mentioned.
The screenshot below shows an automatic email from Jira that informs the dev that a bug has been assigned to them.
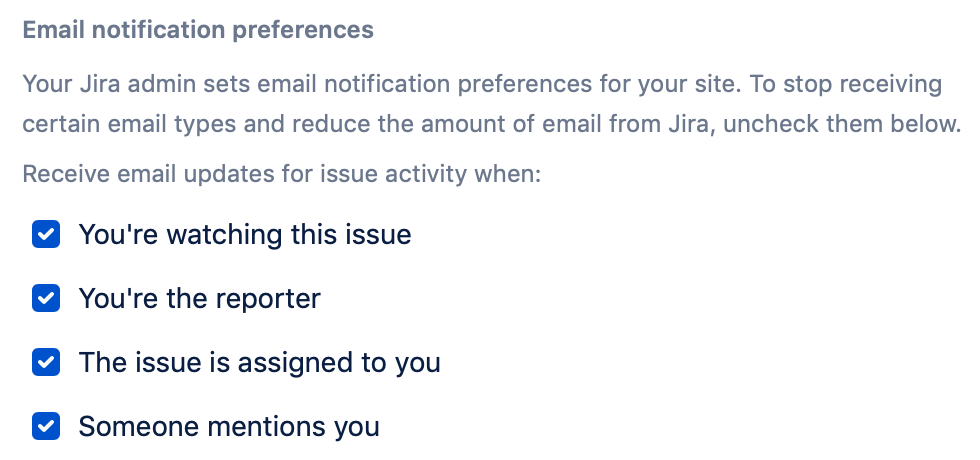
Keep in mind that nobody wants to be bombarded with notifications.
You can remind your team members that they can update their preferences so that they only get notifications for the most relevant events.
To sum up, Jira’s customizability extends to the notification system, meaning that you can set up notifications the way you find the most beneficial.
And if collaboration is a priority within your organization, then Jira’s notifications are worth tinkering around.
Now that you know how to use this popular tracking and management tool, it’s time to fortify your QA operations with the right reporting software.
Shake, our bug and crash reporting tool, is an excellent choice for this because it seamlessly integrates with Jira.
Shake can also streamline your bug-reporting process by eliminating unnecessary manual work. Can you recall what we’ve talked about adding the environment information?
Well, if you don’t want to waste time typing out the software and hardware specifics about the environment where a bug has occurred, Shake can do the hard work instead of you.
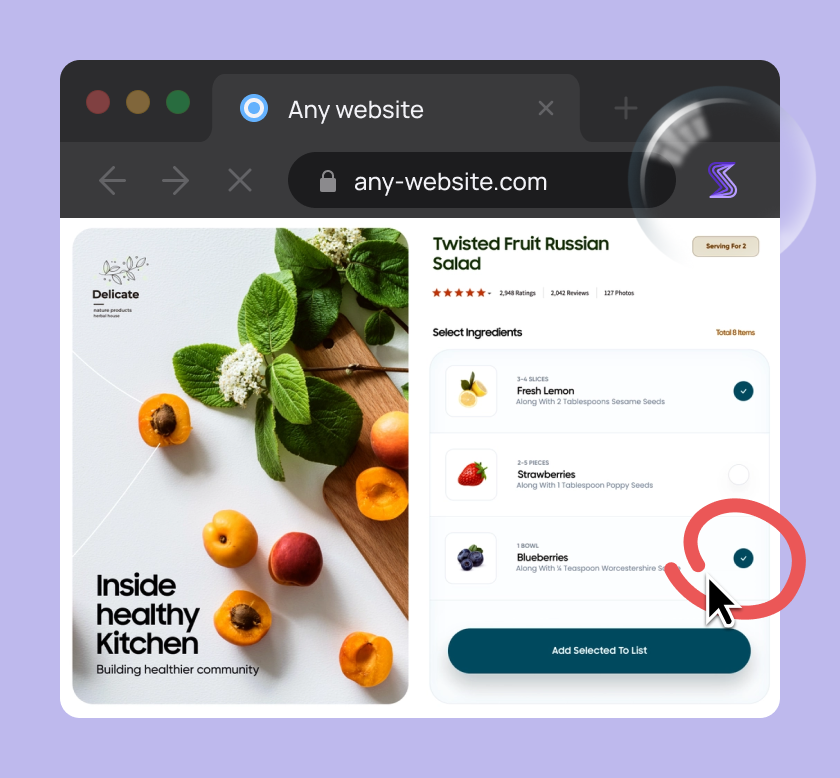
Capture, Annotate & Share in Seconds with our Free Chrome Extension!
The reports that you create with Shake will automatically include 71 data metrics so that you can report and, ultimately, fix bugs faster.
So, if you’re considering tracking bugs with Jira, you should use the opportunity and also upgrade your QA stack with the powerful bug-reporting tool that Shake is.
A click here, a click there, and your Jira issue is ready. If only!
Luckily, following the steps that we’ve outlined above will immensely simplify your bug-reporting efforts in Jira.
And once you establish an effective bug-tracking routine, you’ll be able to apply it project after project, squashing all the bugs.
From internal bug reporting to production and customer support, our all-in-one SDK gets you all the right clues to fix issues in your mobile app and website.
We love to think it makes CTOs life easier, QA tester’s reports better and dev’s coding faster. If you agree that user feedback is key – Shake is your door lock.
Read more about us here.

Add to app in minutes

Doesn’t affect app speed

GDPR & CCPA compliant

Unexpected things pop up
Just like bugs in your app or web 🐛 Fix them now with just one reporting tool.