7 best tools for tracking app user behavior
Whether you’re launching a brand-new mobile app or shipping an update, every step matters.
Different dev teams and leads may follow their own release workflows, but most of them boil down to a few essential steps.
So, if you’re new to release management or just refining your approach, we’ll walk you through a repeatable process to help your team stay calm, move fast, and ship with confidence.
Table of Contents
In many mobile app development workflows, the launch timeline is either driven by a client’s or internal deadline—or left more flexible.
But beyond deciding when to launch, teams also need a clear plan for how the app will be updated afterwards.
Why does this matter?
Because once the app is live and user feedback starts rolling in, structure becomes essential.
That’s when teams, stakeholders, and users benefit most from adopting a more defined post-launch release style.
Let’s look at the three most common ones.
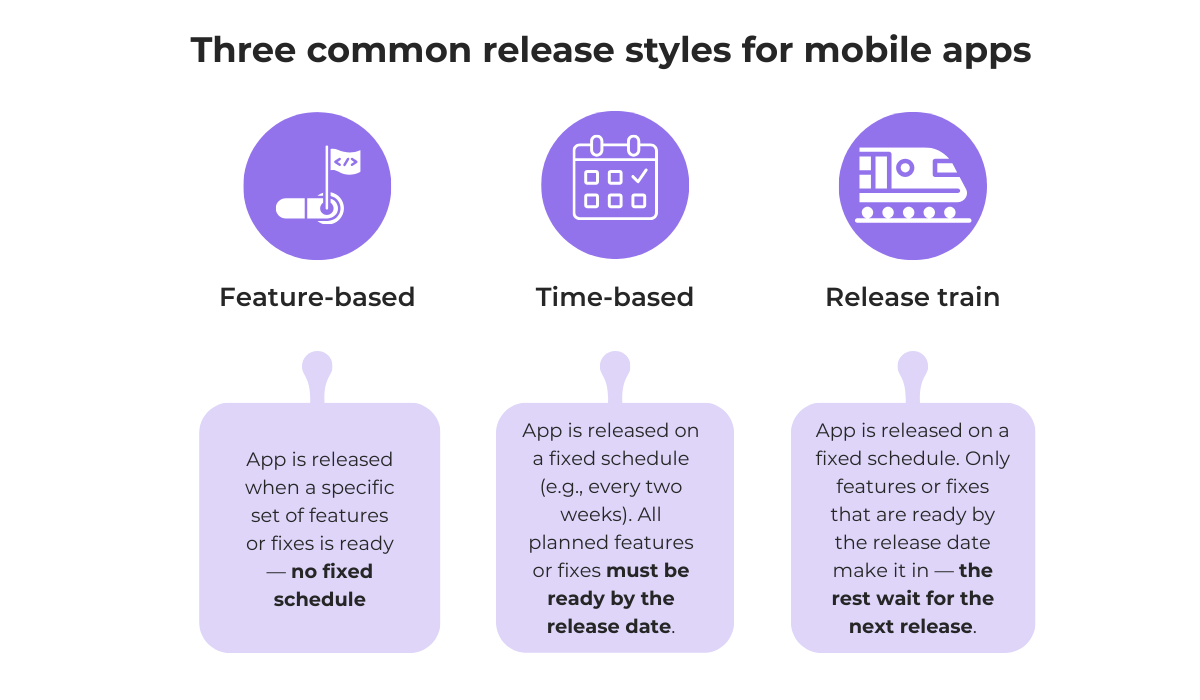
Naturally, each release style has its pros and cons.
Feature-based releases offer flexibility but can cause delays if development gets stuck.
Time-based releases, on the other hand, help teams plan ahead, but they require strict readiness, which can strain QA and development.
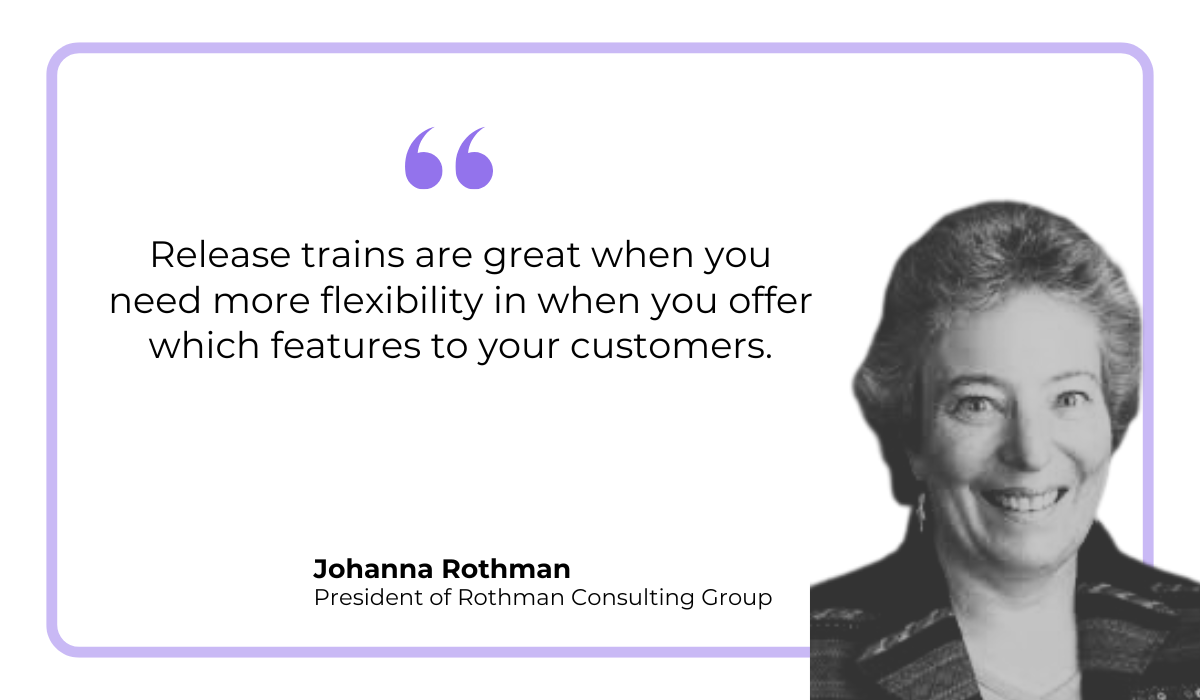
Release trains strike a balance by offering predictability while accommodating delays at the feature level.

Get unreal data to fix real issues in your app & web.
That’s why they’re a popular choice for mature teams.
As Johanna Rothman, president of Rothman Consulting Group, explains, release trains are ideal for teams needing more flexibility:
At the same time, the release train model ensures users get regular updates, which builds trust and drives engagement.
Even if a feature isn’t ready in time, the app continues to evolve on a predictable schedule.
This consistency helps users form habits, boosts app store ratings, and signals reliability, especially valuable in crowded app categories.
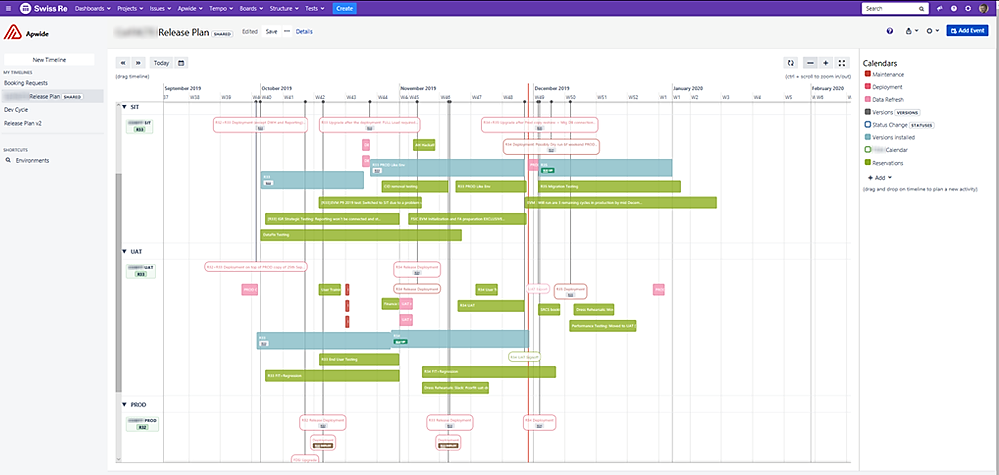
With your launch and post-launch release strategies defined, it’s time to move on to planning the release itself.
This stage lays the foundation for smooth collaboration and predictable app releases.
Since different developers may handle release management at different times, it’s essential to have a clear, documented process, like a playbook or SOP, to guide the workflow and ensure consistency.
While you can build this document from scratch, most teams benefit from refining existing workflows based on past experience.
Release planning includes defining roles and responsibilities, setting schedules, and establishing integrated communication channels to keep everyone aligned.
Let’s zoom in on this phase to explore the key planning activities in more detail:
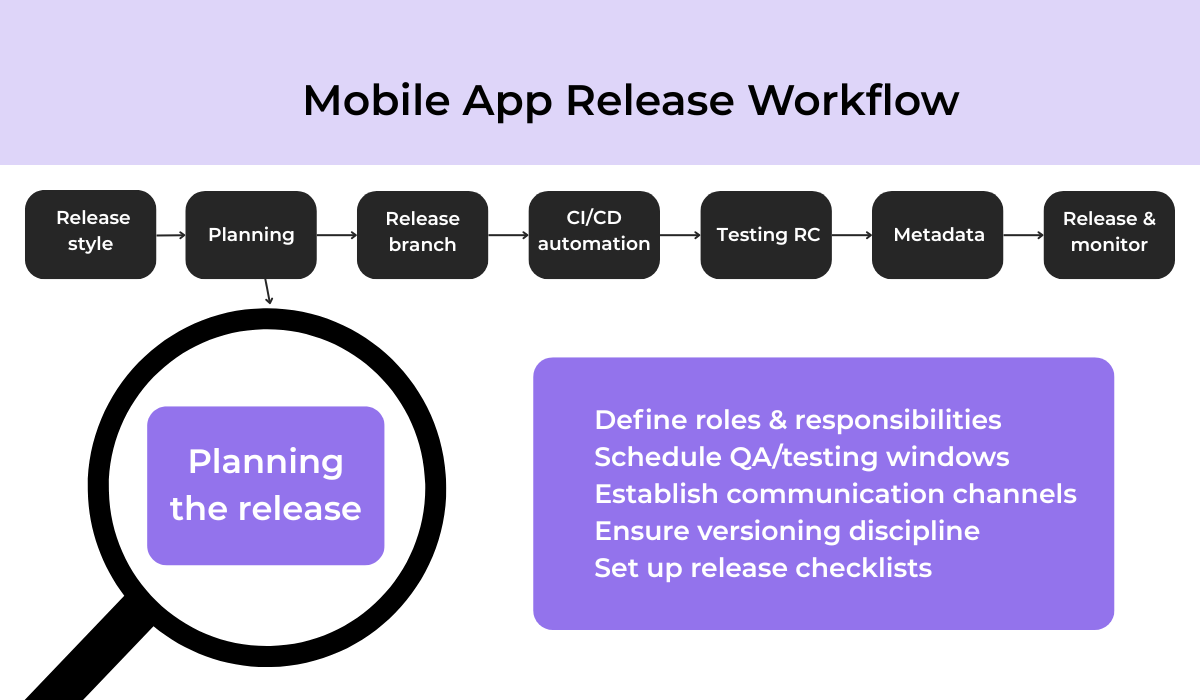
Each of these planning activities helps prevent confusion and delays once the release process is in motion:
Assigning roles and responsibilities, like who merges the release branch or publishes store updates, creates clarity and accountability.
Scheduling QA windows ensures predictable testing and reduces last-minute bottlenecks.
Maintaining versioning discipline helps avoid conflicts between development and release branches.
Structured checklists make sure no steps are skipped, even when release managers rotate.
Finally, establishing communication channels through tools like Slack for messaging, Confluence for documentation, and Jira for task tracking helps everyone stay in sync.
To keep your release planning lightweight but effective, revisit your workflows regularly and update checklists as your app evolves.
Encourage feedback from the whole team, especially after each release.
Once your plan is in place and everyone’s aligned, the next step is to create a dedicated release branch.
Branching creates a parallel version of the codebase at a specific point in time, allowing teams to make changes in isolation without affecting ongoing development.
In the context of release branching, this typically involves:
The GitHub diagram below shows how these branches evolve and connect across versions:
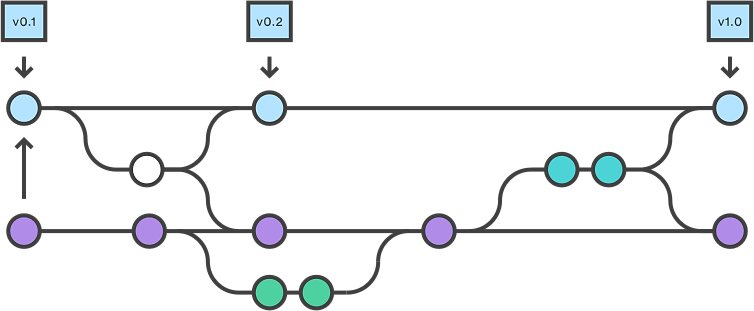
Once a release branch is created, it becomes the single source of truth for that version.
New feature development pauses—only essential changes like bug fixes or final tweaks are allowed.
This approach ensures release stability while letting developers continue working on the next version in parallel.
Many teams follow a similar process to maintain quality and predictability.
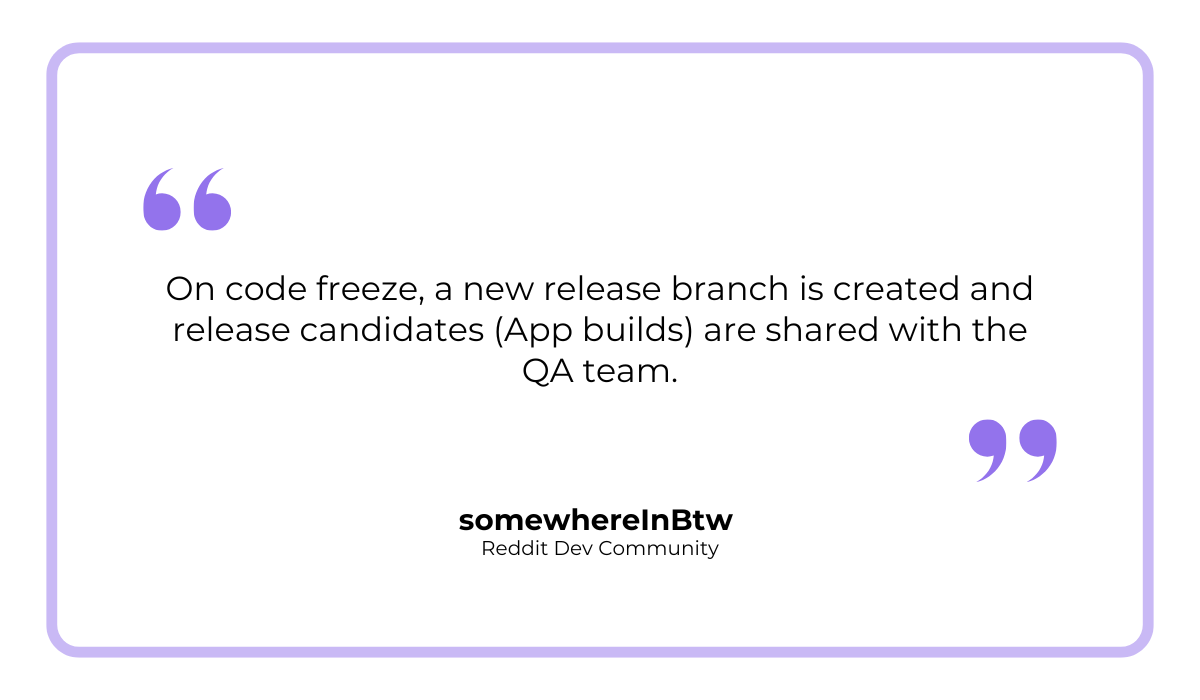
For instance, one Reddit user from the AndroidDev community shared:
This quote highlights the critical moment known as the code freeze, when the release branch is created from the main development line.
From that point, the focus shifts entirely to stabilizing the release.
Release candidates built from this branch are then shared with QA teams for thorough testing, helping catch any bugs early.
However, to make testing efficient and reliable, it’s essential to automate release processes through CI/CD pipelines.
Continuous Integration and Continuous Delivery (CI/CD) are automation practices that help development teams release app updates faster, more reliably, and with fewer errors.
CI automates the process of building and testing the app every time developers push changes to the codebase.
CD extends this by automating the release process—building, signing, and distributing the app to testers and eventually to app stores—with minimal manual steps.
Together, CI and CD form a streamlined pipeline that reduces human error and speeds up delivery cycles.
You can see a typical CI/CD pipeline below, courtesy of GitHub:
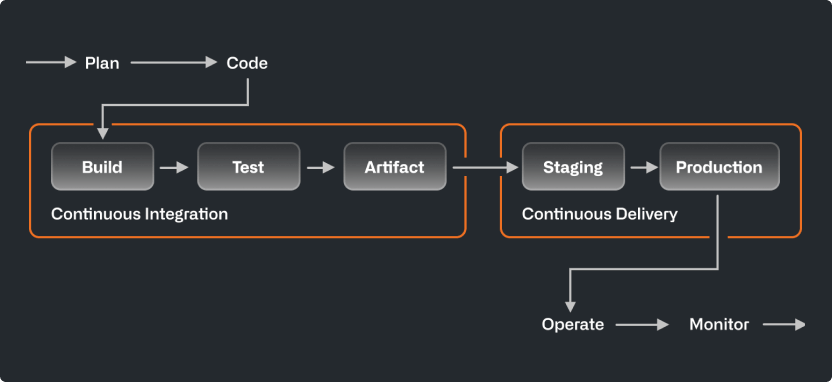
As illustrated above, a CI/CD pipeline automates everything from code integration to app deployment, reducing manual steps and potential errors.
Once your pipeline is mapped out, the next step is choosing the right tools to support it.
Most mobile teams configure automation to trigger on changes pushed to a release branch, running tests and generating signed builds without developer intervention.
These builds are then sent to testers via Firebase App Distribution, TestFlight, or internal platforms.
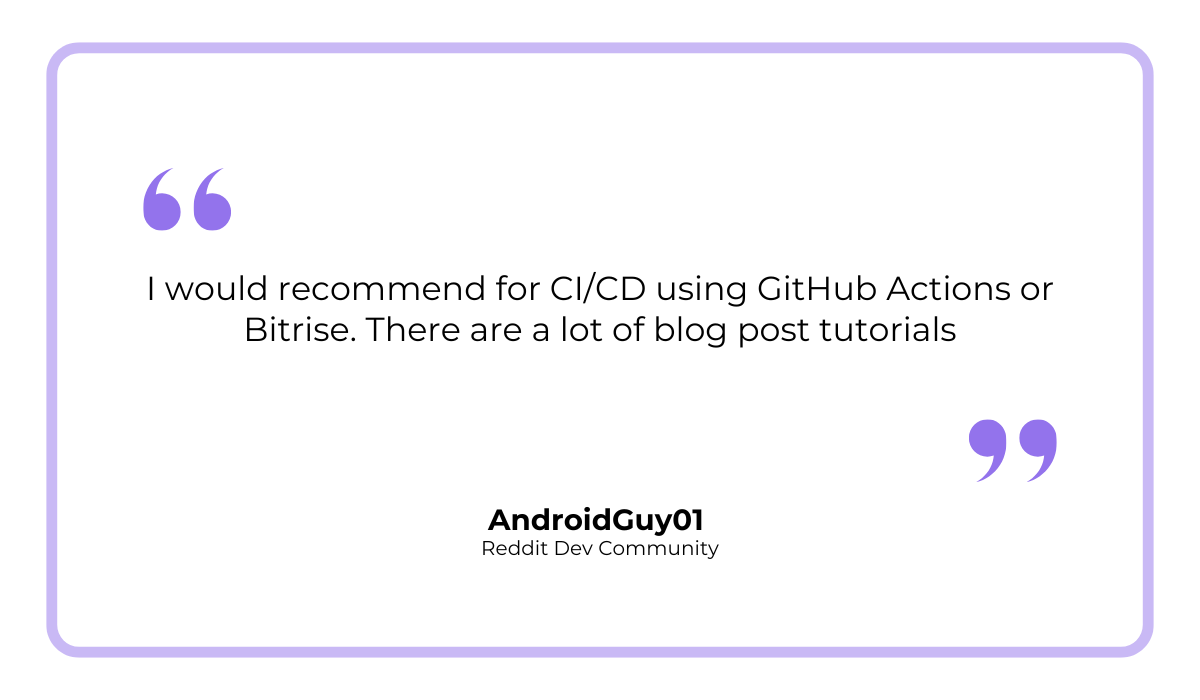
Although setting up a robust pipeline requires some upfront work, especially for new apps, popular tools like Bitrise, GitHub Actions, and CircleCI simplify the process.
For example, here’s one Android developer’s take from Reddit:
Of course, the best CI/CD tools for your team will depend on your tech stack, team size, level of expertise, and project timelines.
Regardless, setting up an automated CI/CD pipeline with these tools lays a strong foundation for reliable releases.
With builds delivered quickly and consistently to testers, teams can focus on thoroughly testing the release candidate.
This stage typically involves multiple layers of quality assurance (QA): from automated checks like regression and smoke tests to manual exploratory testing and crash simulations.
For new apps, this often means full-scope, end-to-end testing across all core features.
For updates, teams usually focus on risk-based testing, targeting recent code changes.
Beta testing, both internal and external, also plays a crucial role in uncovering real-world issues before public release.
Here’s an overview of common release candidate testing types:
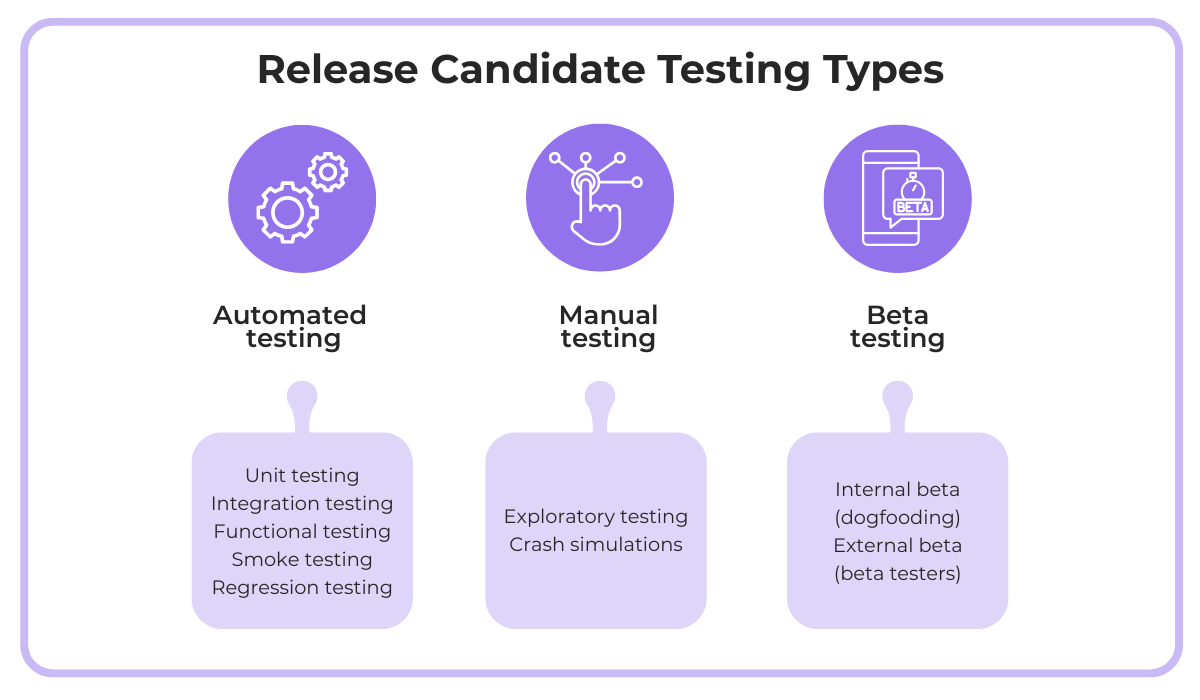
Automated testing helps catch regressions and functional issues early, but manual testing is just as vital for exploring edge cases and usability problems.
Exploratory testing, crash simulations, and real-world beta feedback often expose bugs that automation might miss.
For example, internal and external beta testers can use our Shake—easily integrated into your app without affecting its size or speed—to report issues.
When users encounter a bug, they simply shake their device, and Shake automatically generates a detailed bug report.
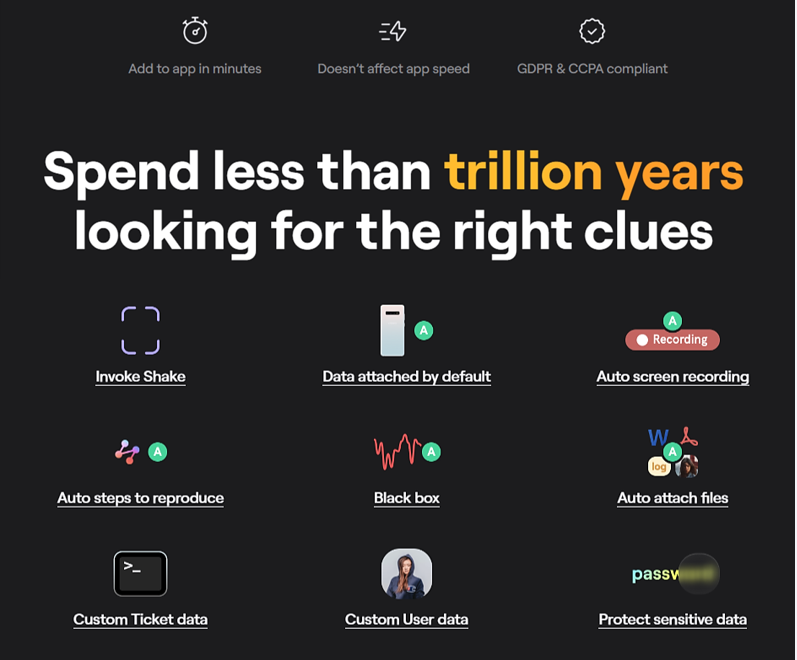
Tools like Shake help QA teams and beta testers submit clear, reproducible bug reports with minimal effort.
This accelerates triage, tightens feedback loops, and improves overall release quality.
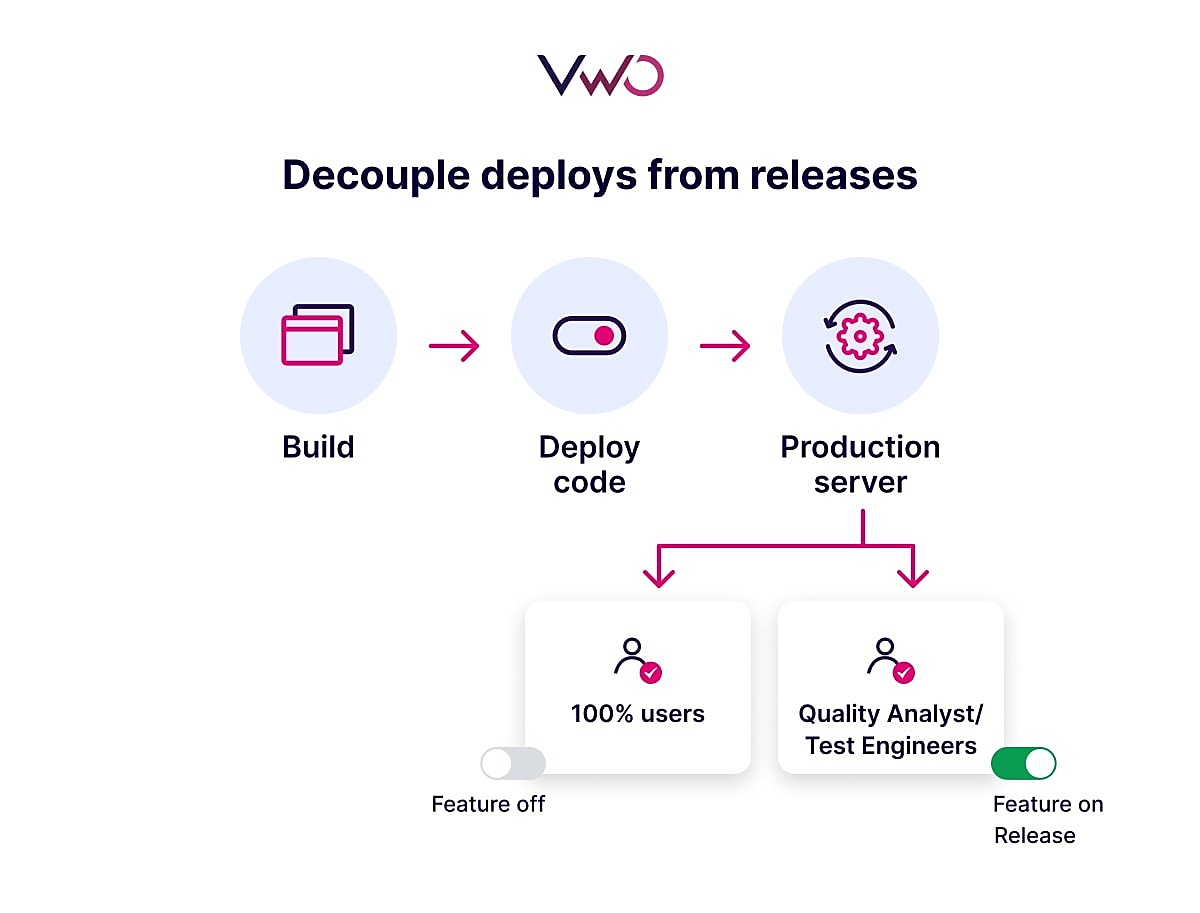
To further reduce the risk of exposing bugs to all users, many teams also rely on feature flags.
Feature flags (or toggles) are conditional switches in the code that let developers merge new features into the main branch while exposing them only to select groups, such as testers, internal users, or specific beta cohorts.
This enables gradual rollouts while keeping unfinished or risky features hidden from the general public.
Here’s how a typical feature flag flow works:
Using layered testing, real-world feedback, and tools like feature flags gives teams the confidence to release with fewer surprises.
Once your release candidate is stable and tested, it’s time to focus on the final step before going live: preparing your app store metadata.
For both new apps and updates, preparing accurate and optimized app store metadata is a crucial final step before release.
In most cases, this means working with one (or both) of the two major platforms:
For new apps, this means setting up your entire store presence from scratch: creating accounts, naming your app, writing descriptions, uploading visuals, and ensuring compliance with store guidelines.
To illustrate, here’s a relevant excerpt from Google Play’s metadata requirements:
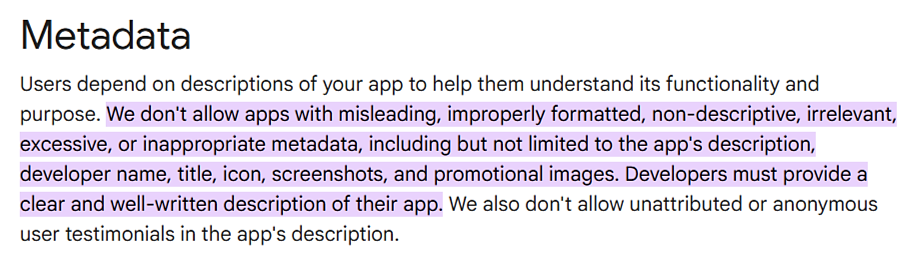
Naturally, the Apple App Store has its own metadata requirements, which don’t always align with Google Play’s, so it’s important to stay coordinated.
Metadata affects not only compliance but also how easily users can discover your app.
That’s why setting up metadata for new apps is more involved, but also essential.
As discussed in the next section, you’ll need to submit and get approval for everything from your app’s title and screenshots to privacy policies and contact details.
Update releases are simpler, usually requiring changes to the version number, release notes, and visuals, if needed.
Capture, Annotate & Share in Seconds with our Free Chrome Extension!
Here’s a comparison of what’s typically required for each:
| Metadata Task | New App Launch | App Update Release |
| App Title | Set for the first time | Remains unchanged (unless rebranding) |
| Description & Keywords | Write from scratch | Tweak or optimize based on performance |
| Screenshots/Videos | Upload required visuals | Replace if UI or features have changed |
| Privacy Policy & Contact | Must be submitted | Review for updates |
| App Store Category | Choose a relevant category | Rarely updated |
| Age Rating | Must be submitted | Review only if applicable |
| Release Notes | Not applicable | Required for every update |
| App Version Number | Initial version (e.g., 1.0.0) | Increment for each release |
Accurate and compliant metadata is key to a smooth launch and successful updates.
Remember, well-crafted metadata ensures both user discoverability and smooth store approval.
With that groundwork complete, the final step is to submit your app for approval.
At some point—not necessarily when everything is fully ready, but close—you’ll need to submit your app or update to the relevant app stores and begin the review process.
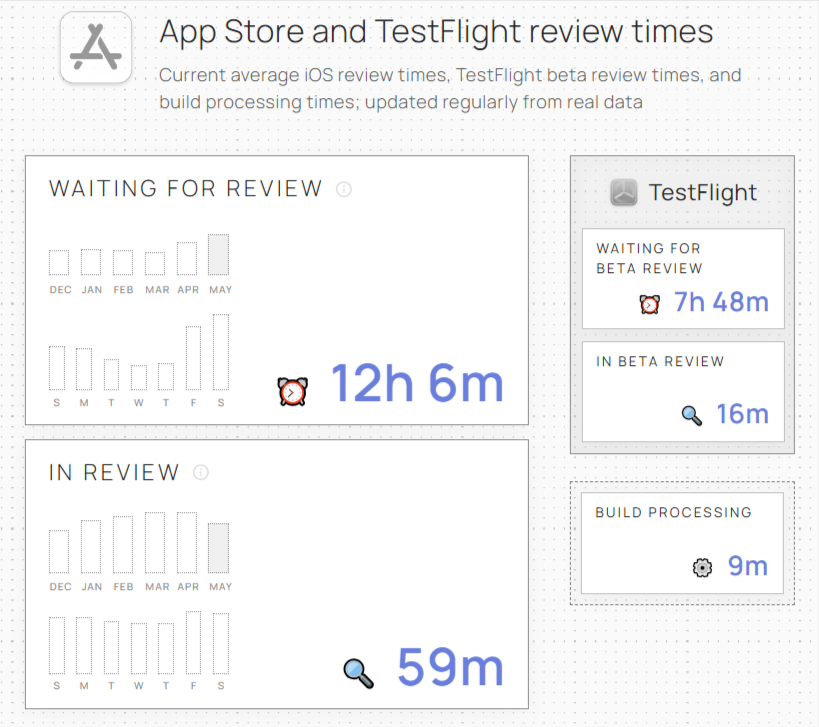
Review times can vary significantly, from a few hours to several days, depending on the platform and your submission details.
Rejections are also common.
In 2023, Apple rejected 26% of submissions. While Google’s rejection rate isn’t publicly disclosed, it’s reportedly on the rise.
That’s why metadata compliance matters, and why teams should coordinate roles and permissions to avoid delays.
Tools like Runway can help track review times and streamline this phase:
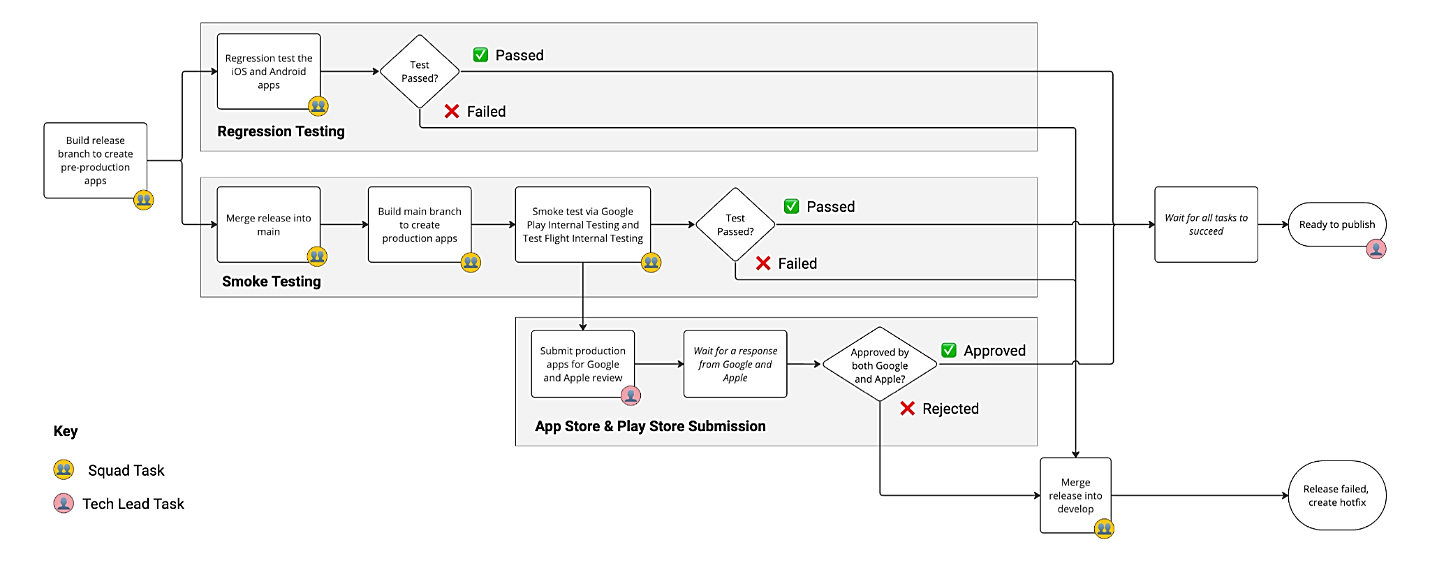
To prepare efficiently, many teams run critical tasks in parallel, such as regression testing, smoke testing, and app store submission.
This coordinated approach helps minimize delays and enables quick turnaround times, sometimes pushing new versions from code commit to ready-for-publication in under 24 hours.
The image below illustrates how these parallel sub-processes work together to accelerate your release pipeline, setting the stage for a smooth rollout.
Once your app passes review, staged rollouts (Google Play) or phased releases (Apple App Store) allow you to gradually release updates, reducing risk and enabling early feedback collection.
After release, monitoring is essential.
Track key metrics like crash rates, error logs, and user reviews to spot issues early.
Tools like Shake are especially valuable for capturing bugs and enabling fast hotfixes when things go wrong.
Finally, keep in mind that both new apps and updates follow a release–observe–fix cycle to ensure a stable, high-quality experience for your users.
As we’ve seen, mobile app release management is about delivering updates reliably, efficiently, and with user experience at the forefront.
From pre-release testing to post-release monitoring, every step has its role in maintaining quality.
By streamlining workflows, coordinating teams, and using the right tools, you’ll set your app up for smoother releases and long-term success.
From internal bug reporting to production and customer support, our all-in-one SDK gets you all the right clues to fix issues in your mobile app and website.
We love to think it makes CTOs life easier, QA tester’s reports better and dev’s coding faster. If you agree that user feedback is key – Shake is your door lock.
Read more about us here.

Add to app in minutes

Doesn’t affect app speed

GDPR & CCPA compliant

Unexpected things pop up
Just like bugs in your app or web 🐛 Fix them now with just one reporting tool.