Recommended
Best mobile application testing tools
In our modern era, it’s hard to imagine a day without mobile apps.
But have you ever taken a moment and asked yourself how these technological wonders are fine-tuned?
What goes behind the scenes so that they function impeccably and are so useful?
This is where a thorough testing process comes into play. It’s a series of activities that help ensure that a mobile app is ready for release to the public.
That’s why we’re going to explore eight key steps of the testing process that are crucial for the success of any app.
So, if you’re curious about the secret sauce that makes your favorite apps work seamlessly, stay tuned!
Table of Contents
A mobile app’s requirements are central to any testing process.
Knowing what the app is supposed to do helps determine the scope of tests and aids in choosing appropriate test types.
But what are the app requirements?
Essentially, it’s a list of functional and non-functional needs that the app must be able to meet.
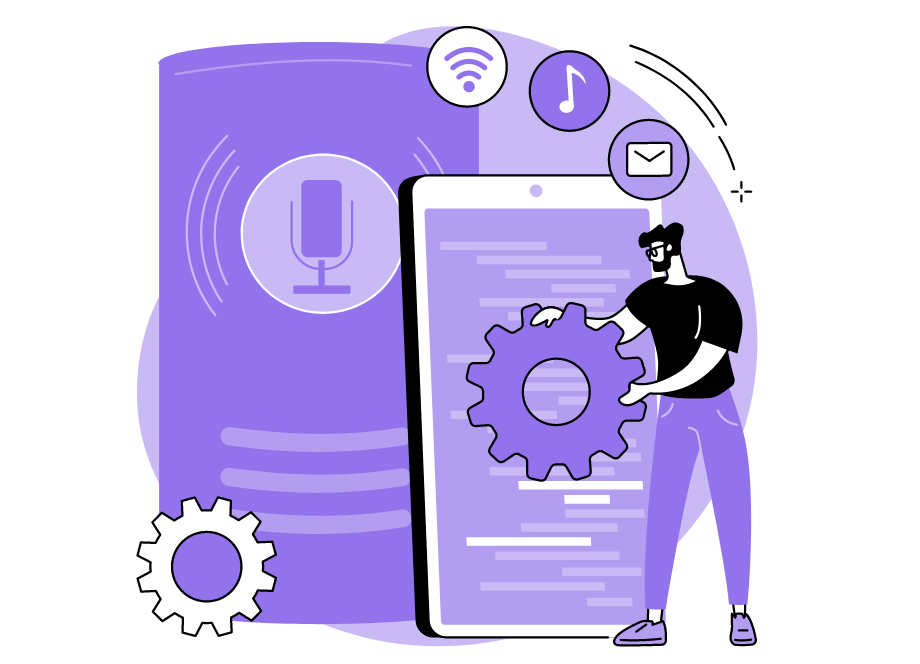
Functional requirements, as shown in the picture below, are those that specify what an app must do, so they are focused on the business and usability features of an app.

Non-functional requirements, on the other hand, provide information about how an app should behave and are more concerned with performance aspects.
For example, a functional requirement may be The user can enter their name, while a non-functional one could be The app loads within three seconds.

Get unreal data to fix real issues in your app & web.
It’s paramount that requirement analysis be performed before testing because it’s an excellent way to ensure the proper course of action is taken during tests.
There are seven major characteristics that requirements should fulfill to ensure they’re complete and correct.
They should be:
For example, if you look at the bad requirement below, you’ll notice that it’s not atomic because it includes two concepts: “undergraduate” and “postgraduate” courses.
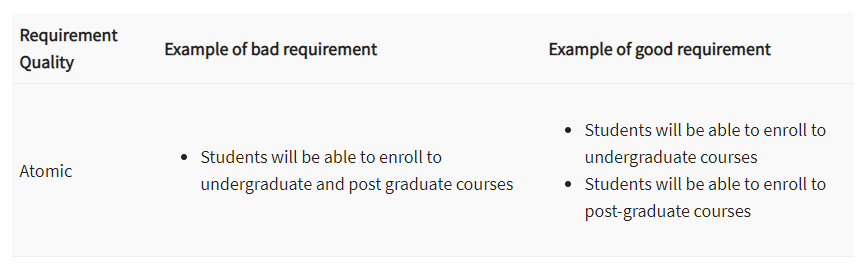
You should, therefore, split this into two requirements―one for each type of course.
By carefully examining the requirements according to these seven elements, you can identify any errors and correct them before beginning the next, planning phase of testing.
After the requirements have been thoroughly analyzed, it’s time to get down to the nitty and gritty of crafting a test plan.
The test plan will be the roadmap for the entire testing process, so it’s essential to create a comprehensive document that covers all of the bases.
Here is a brief example of what this plan could encompass.
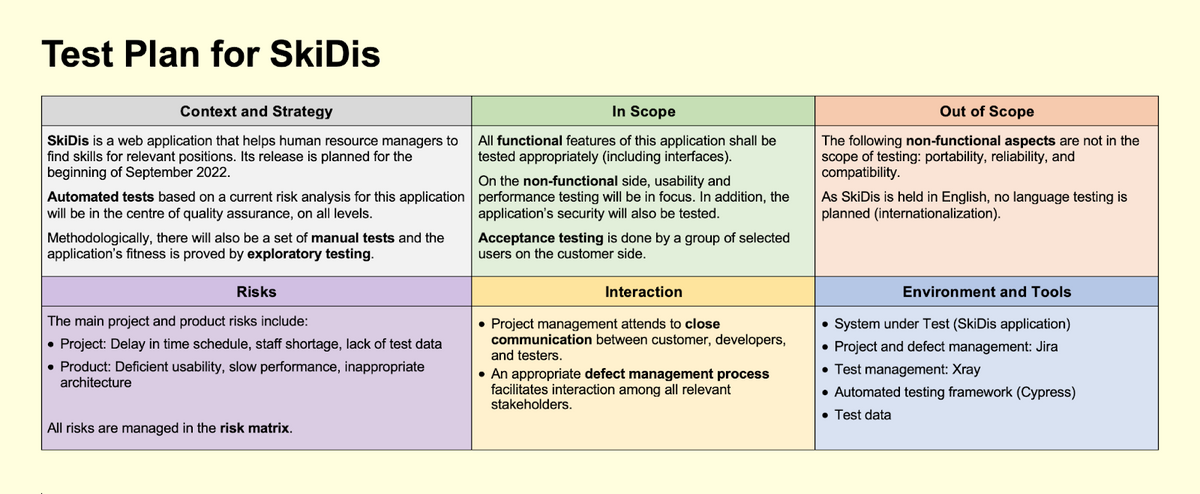
Therefore, it should include all the relevant sections of the testing process, including the scope, schedule, tools, resources, and environment.
Creating a test plan involves the following steps:
For example, it’s a common practice to start with product analysis and do some research on the app to gain a better understanding of what to expect from your testing activities.
You can then move on to designing your testing strategy, which includes determining the scope, testing types, assumptions about risks and issues, and test logistics.
In the next steps, you’ll have to dig even deeper and figure out your test objectives and test criteria, plan how you’re going to allocate your human and system resources, schedule everything, and, finally, determine deliverables at every step of the way.
It’s a challenging process, but it’s necessary to get things right from the start because of everything that hangs in the balance.
Now that you have planned your testing process, it’s time to determine the best way to execute that plan.
Here’s where you face a crucial decision: to do it manually or to use automation.
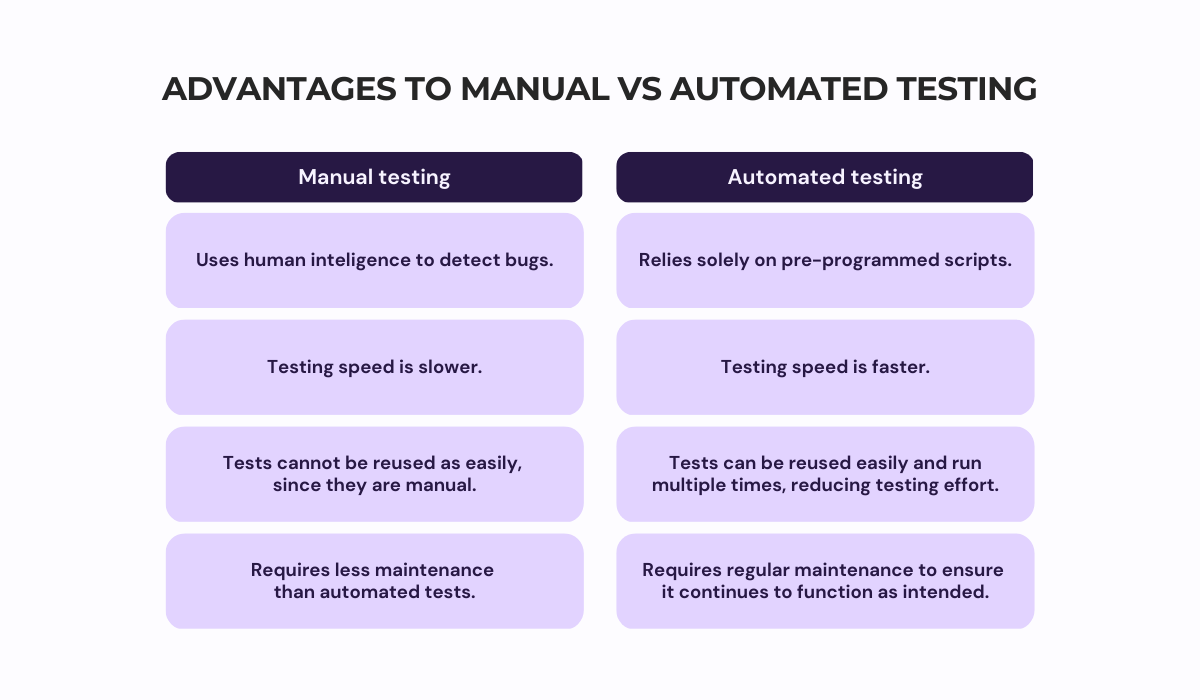
Manual testing is the more traditional approach where human testers, as the name indicates, manually scrutinize the app to evaluate its functionality.
It’s the closest you can get to real-world usage, making it highly valuable for detecting usability and design flaws.
However, that type of testing isn’t usually the developers’ and QA specialists’ first choice, as it requires a substantial investment of time and energy.
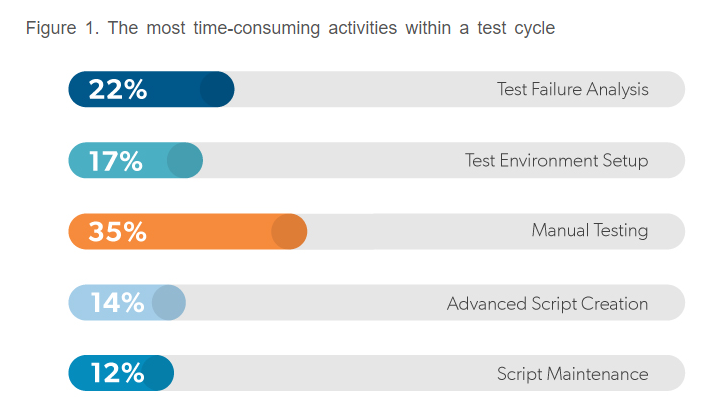
In fact, statistics show that manual testing is the most time-intensive part of the testing cycle, so it’s no surprise they’re not so keen to perform it.
On the other hand, automated testing is fast, reliable, and can be run repeatedly without requiring human intervention.
You can even grab a cup of coffee while your automation tools do the heavy lifting.
Nevertheless, using automated testing requires investing in the right tools, and it can potentially miss edge cases that only human testers would catch.
So, the real question isn’t whether to use manual or automated testing, but rather when to use each.
For example, manual testing is best for usability testing, where you want to observe how real people interact with the app.
Meanwhile, automated testing is ideal for repetitive, time-consuming tasks like regression testing, where you need to verify whether the new changes are compatible with the current version of the software.
All in all, by strategically scheduling time for manual and automated tests, you can optimize your testing process for maximum efficiency and effectiveness.
In the next step of the process, test cases and test scripts should be created.
Test cases define the steps required to test each function of an app, as well as what results should be expected.
This provides clear instructions and expectations for QA experts during manual testing.
If you’re testing the login feature as in the example below, then there may be several test cases that are designed to validate the login process, one of which can be to check login with valid data.
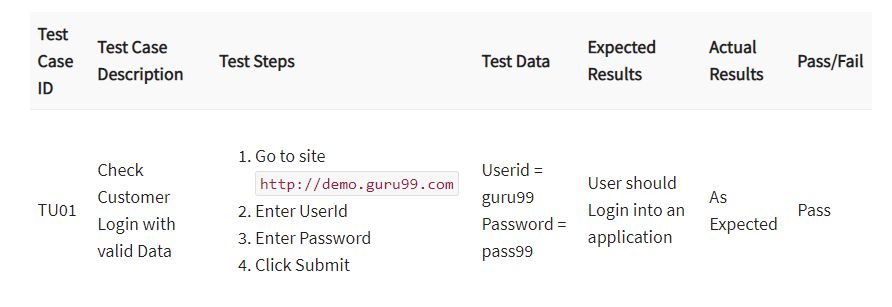
This example also shows that, to create a test case, several elements must be defined, such as:
This way, QA specialists will have all the information necessary to know exactly how to execute the test case and what to expect as a result of performing these steps.
On the other hand, a test script is an automated set of instructions written in a programming language that controls the execution of test cases.
There are three principal ways to write test scripts:
The record/playback method involves recording user actions and converting them into scripts that can be repeated (or played back) at a later time.
In keyword/data-driven scripting, a test script is written by specifying keywords that identify a particular action.
These two methods require less programming knowledge, but they can be more difficult to maintain over time.
The third, most comprehensive method is to write scripts using a programming language such as Java or Python.
It offers the greatest flexibility and control over test execution but requires expertise in writing code.
Overall, after collecting requirements, writing test cases and test scripts is the most important step in testing because it provides a logical framework for executing tests consistently.
Once the test cases and scripts have been crafted, the next crucial step involves constructing an environment that can mimic dynamic and intricate real-world conditions.
Failing to do so could lead to an undesirable outcome, where your end users may be subjected to an unpleasant experience when the application malfunctions.
Imagine, for instance, that you have developed an app that specializes in selling clothes. Suppose you want to test a new feature that enables users to select clothes based on color.
If you opt to execute this test in a production environment, your app may experience hitches and other errors that will cause inconvenience to the end users.
Consequently, conducting comprehensive testing in a carefully controlled and isolated testing environment will enable you to examine this new feature and identify any bugs or glitches without the slightest apprehension of any negative ramifications for the end users.

Therefore, each test environment should comprise several critical elements, including:
At this point, it’s crucial to add appropriate tools to your testing equation because this can streamline the process tremendously.
For example, Shake, our own bug and crash reporting tool, is able to automatically capture more than 70 errors that occur during the testing process.
Some of these are shown in the picture below:
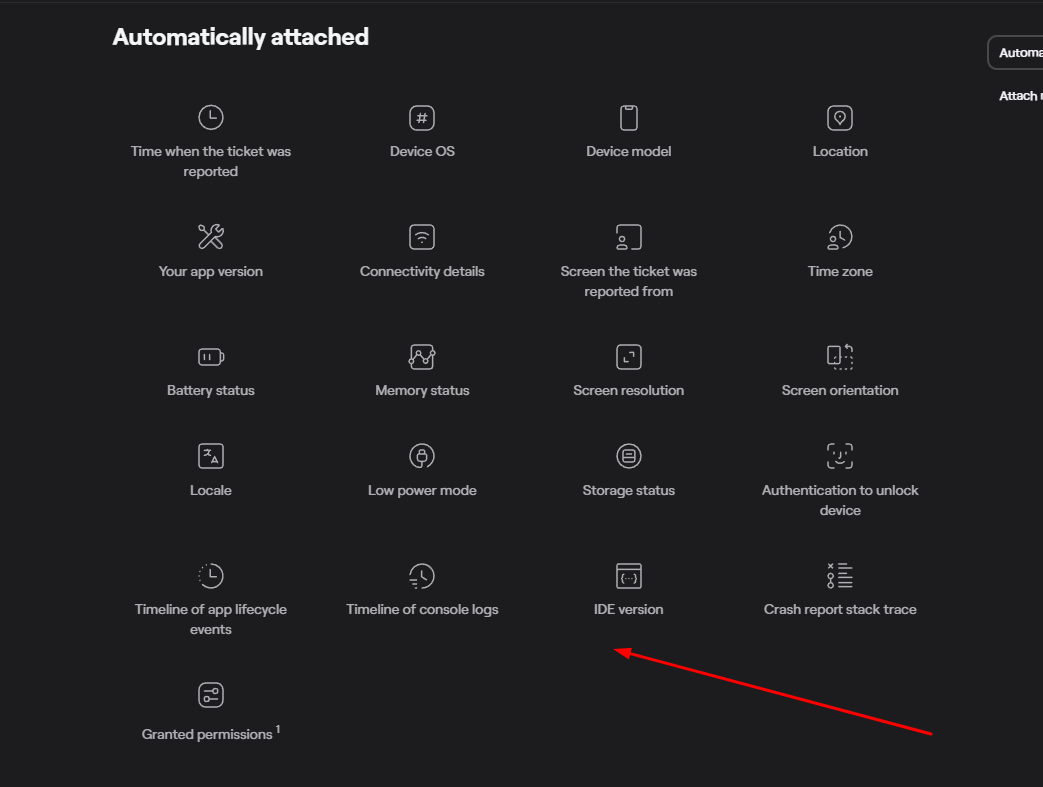
And because Shake is designed in a way that enables easy integration with issue tracking, it can automatically generate a bug report with all relevant information and export it directly into Jira, Trello or Asana.
This way, testing in the testing environment is not only quicker but also super easy to manage.
Functional testing is unequivocally one of the crucial stages of app testing.
Here, each feature is put to the test to discern whether it operates as it was initially intended and whether it correlates with the design and business requirements.
Essentially, the inner workings of the app here are of no interest to QA specialists, as they’re solely focused on verifying whether the application works as envisioned.
This is why functional testing falls under the purview of black box testing.
During functional testing, QA specialists typically scrutinize mainline function, usability, accessibility, and error conditions.
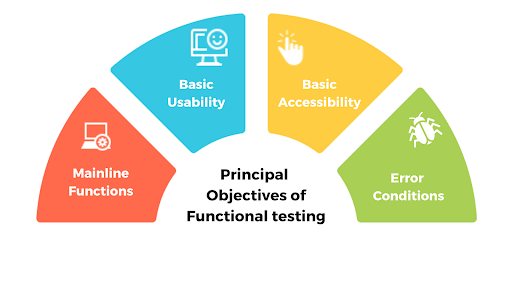
These areas encompass a wide array of elements, such as:
Functional testing involves many more examples of features that must undergo tests.
But, if any of these elements fail to work seamlessly within the application, it risks rendering the entire app useless by users—which highlights how important this type of testing really is.
Several types fall under the category of functional testing, as depicted in the picture below.
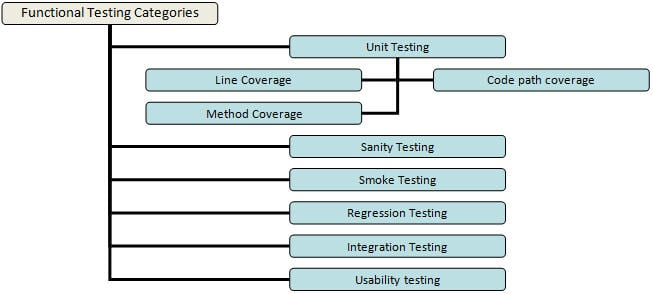
However, one of the most common types is usability testing.
This type of testing is used to confirm if the application is not only easy to use but also visually appealing. It also measures whether the design of the application is intuitive enough for users to navigate through it effortlessly, without requiring any instruction.
All things considered, functional testing carries immense significance for any application.
It serves to ensure that everything works without a hitch, thereby allowing the end user to have an enjoyable experience with the app.
Functional testing is only one side of the coin.
To fully gauge the application’s viability, you should also zero in on its performance, reliability, and security, among other key facets.
Therefore, non-functional testing should also be carried out alongside functional testing.
For example, the way in which an app withstands the onrush of user traffic during a high-stakes event, like a concert ticket sale, falls under the domain of non-functional testing.
Here, QA specialists also try to determine how resilient and safe the app is, how quickly it can recover after a crash, and how it behaves in different environments, to name just a few crucial factors.
Even at first glance, it’s clear that this also is a paramount form of testing that can significantly affect the user experience.
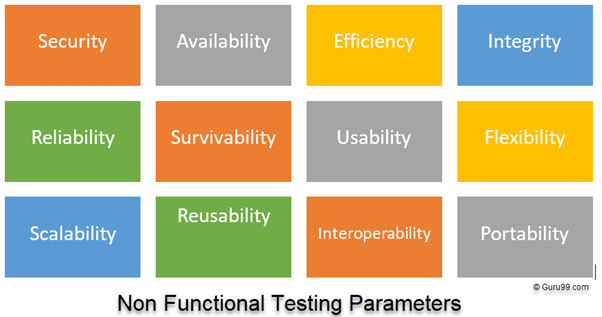
It’s also apparent that it encompasses a whole host of different testing types, as the picture below clearly shows.
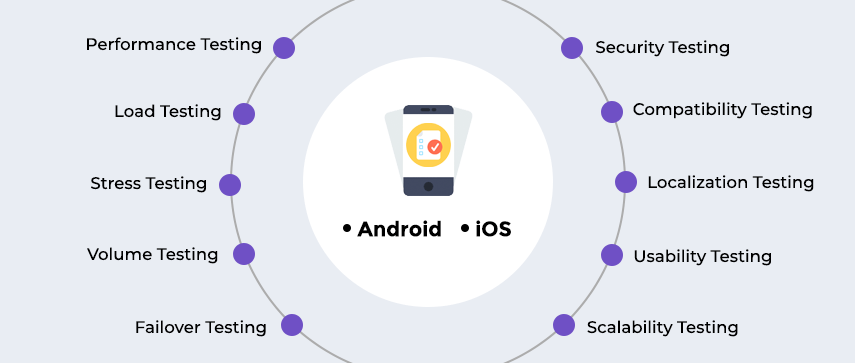
Take performance testing, for instance, which is utilized to assess an application’s speed under ordinary conditions and under a tremendous workload, whereas load testing measures the application’s loading capacity.
Meanwhile, given the very nature of mobile apps, they require additional testing, such as localization testing, compatibility testing, and so on.
Non-functional testing is just as critical as functional testing, as the two go hand in hand when you want to form an optimal user experience.
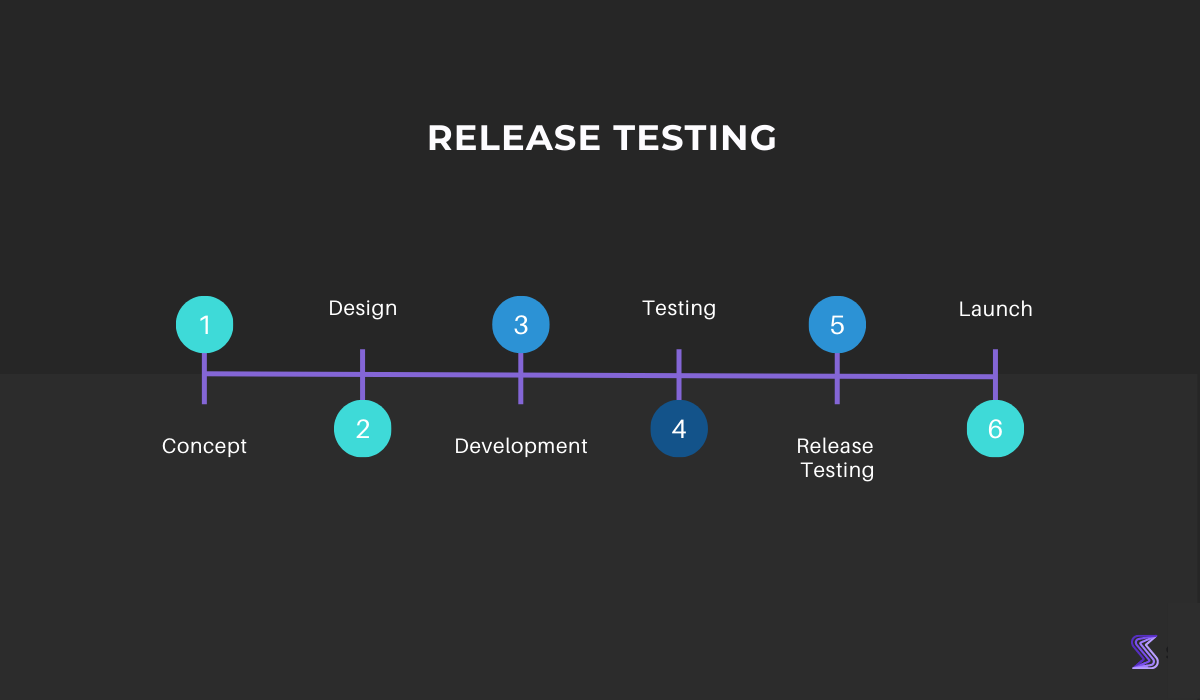
After a battery of non-functional and functional efforts, release testing is the final round of assessments that the latest iteration of an app is put through to validate its readiness for launch.
In essence, it’s the last line of defense against any lingering gremlins that might have slipped through and can impede the end-user experience.
Accordingly, it’s carried out towards the end of the software development cycle, just before the public launch, to ascertain its quality and fitness for use.
Release testing is a broad category of app tests that includes automated and manual techniques for checking how well the application functions in its end state.
This form of testing typically incorporates regression and user acceptance tests but focuses especially on end-to-end tests.
Capture, Annotate & Share in Seconds with our Free Chrome Extension!
End-to-end testing, which examines the app from start to finish and verifies that it works well under real conditions, is crucial because it covers all of its components and integrations.
This includes assessing its interface and network communication with databases and backend services to ensure that it functions as intended.
As you can see in the diagram below, end-to-end testing involves two types of tests: horizontal and vertical.
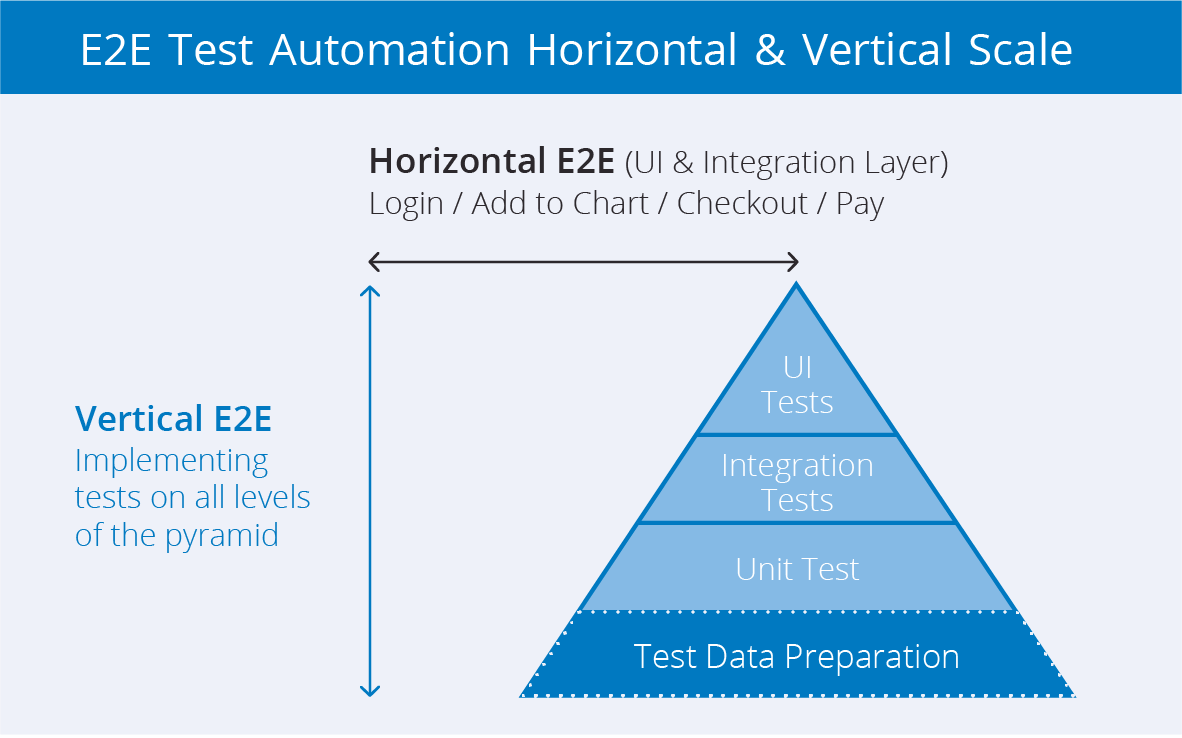
Horizontal testing evaluates an application from the user’s perspective, going, for example, through a login process from starting at the beginning and continuing to completion without interruption.
In vertical testing, an application’s architecture is tested in layers or from top to bottom.
That means that each component can be independently verified as a standalone unit before any interactions between individual pieces occur.
This way, you can conduct thorough testing of your finished app at the end of development, just before deployment.
All things considered, release testing is the crucial final step that ensures the smooth sailing of any app’s launch and safeguards it against any pesky bugs that might have slipped through.
There you have it―the complete testing process that can make your app functional, user-friendly, and bug-free.
From establishing the app’s requirements and test cases to executing tests and reporting bugs, each and every cog in this intricate machine contributes to the success of the testing process, and thus the application itself.
We hope these tips will come in handy and serve as a guide in your own testing efforts.
From internal bug reporting to production and customer support, our all-in-one SDK gets you all the right clues to fix issues in your mobile app and website.
We love to think it makes CTOs life easier, QA tester’s reports better and dev’s coding faster. If you agree that user feedback is key – Shake is your door lock.
Read more about us here.

Add to app in minutes

Doesn’t affect app speed

GDPR & CCPA compliant

Unexpected things pop up
Just like bugs in your app or web 🐛 Fix them now with just one reporting tool.