
Recommended
A full guide to bug triage meetings

You’re probably already familiar with the fundamentals of bug triage as a way for effective bug management—but are you maximizing its potential?
After all, even seasoned teams can fall into inefficient patterns and fail to follow the right steps to make the most out of this practice.
Luckily, this guide will take your bug triage to the next level.
We’ll go into each of the steps of bug triage, exploring best practices and strategies to streamline your workflow along the way.
Whether you’re just getting into bug triage or want to optimize some aspects of your existing process, like bug reporting or resource allocation, this guide has something for you.
Let’s start!
Table of Contents
The first step in any bug triage process is, naturally, identifying the issues and collecting detailed bug reports.
Errors and defects can surface at various stages of the development lifecycle, sometimes as early as the coding process itself.
Luckily, most modern application frameworks come equipped with mechanisms to catch these problems with varying degrees of immediacy.
Let’s take a look at a coding example from the popular web application framework Ruby on Rails.
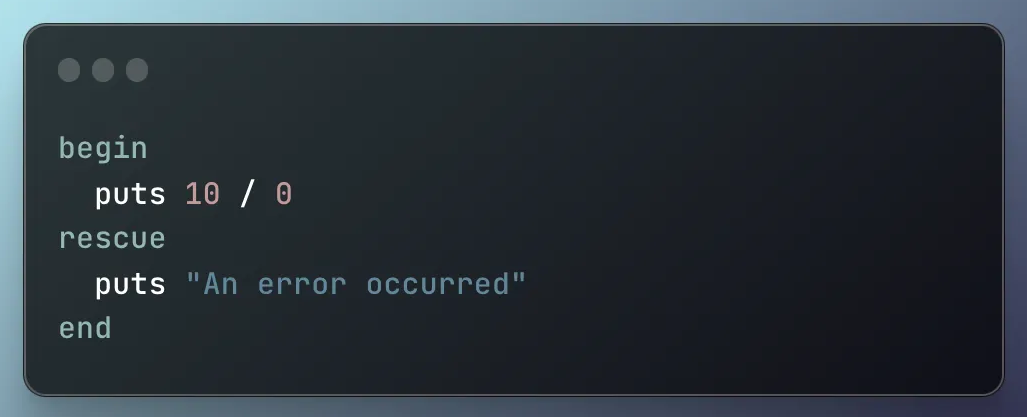
This snippet of code attempts to divide 10 by zero.
Since division by zero is mathematically impossible, there will be a problem when the code is executed, raising a ZeroDivisionError exception.
However, Ruby’s built-in error-handling features come to the rescue, catching this exception and triggering the message “An error occurred” to appear.
While this is a simplified example, these features become incredibly valuable for identifying bugs within complex codebases.

Get unreal data to fix real issues in your app & web.
But what if an issue slips through the cracks and is discovered only after the coding stage, like during a beta test, or even worse, after release?
This is where bug reporting comes in.
A detailed bug report should be created to document the issue.
Though bug reports can be written in a variety of formats, it’s generally best practice to use a dedicated bug tracking or bug reporting system.
These systems are useful because they make it easy for users and testers to create issues and bug reports while helping to ensure the right information is captured.
As for some of the key details of these reports, we’ll discuss them in the next section.
In any case, all of these newly identified bugs need to be collected and stored in a centralized location—this is your bug backlog.
Take a look at the backlog feature of YouTrack below as an example.
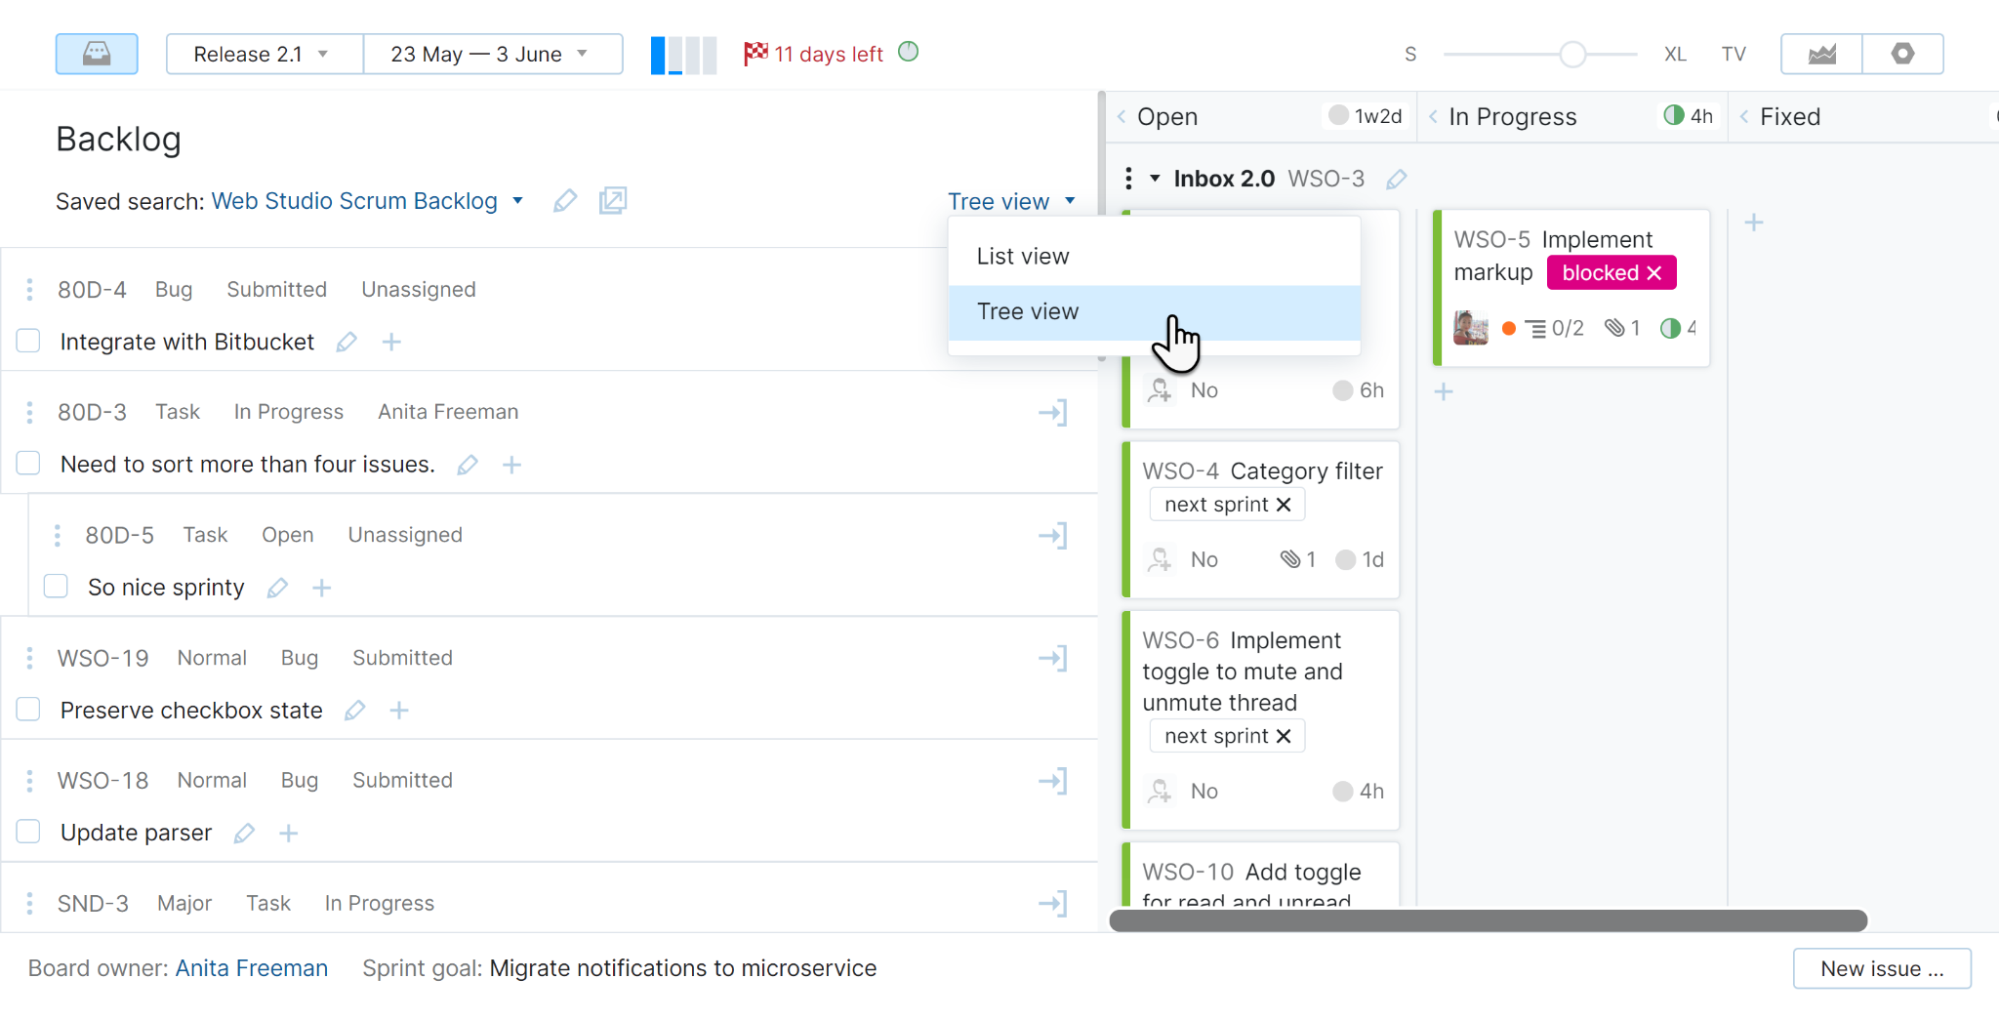
Specialized bug trackers and bug management tools are invaluable here as well, as they provide clear visualizations of the backlog and offer handy tools and filters to sort and manage incoming reports.
Overall, detailed bug reports plus an organized backlog are crucial as we move on to the next phases of bug triage.
You now may have a backlog full of bug reports, but it’s crucial to review these reports and see if they contain all the necessary data for effective troubleshooting.
This is done in the second step of bug triage, typically handled by the project manager, testing team lead, or a designated developer.
Detailed and accurate bug reports are essential for various reasons, like assessing a bug’s validity, determining its severity and priority level, and ultimately, enabling developers to reproduce and fix the issue efficiently.
Let’s take a closer look at what a well-crafted bug report should contain.
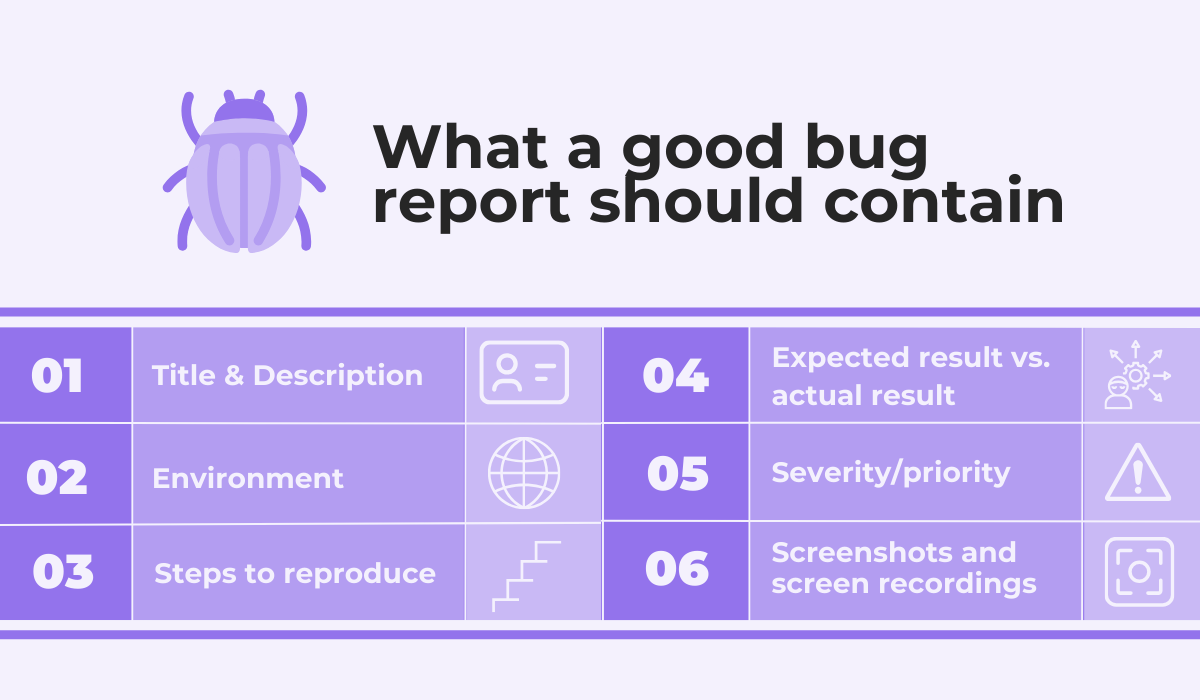
Beyond a clear bug identifier (like the bug title or ID code) and a detailed description of the problem, high-quality bug reports include essential environment data.
This might consist of the device or system type, operating system version, browser version for web apps, and any relevant software dependencies.
Without this crucial information, it is very difficult for developers to pinpoint the root cause of the issue, potentially leading to wasted time and delayed fixes.
But manually collecting these details is not only tedious—it’s also prone to errors and missed vital information.
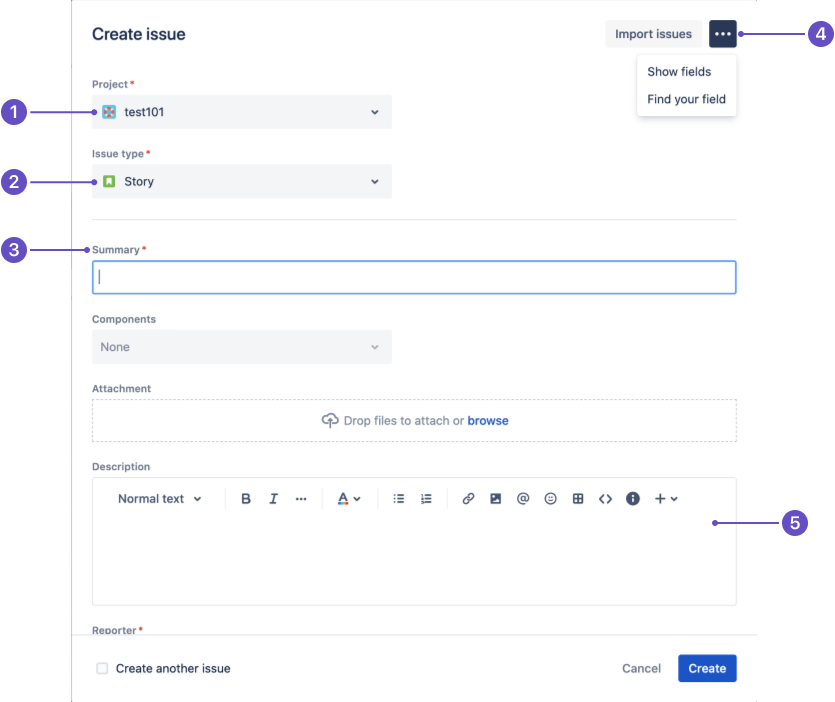
This is where specialized bug reporting tools like Shake shine.
With a simple shake of a device when a bug occurs, users and testers are guided to Shake’s New ticket screen.
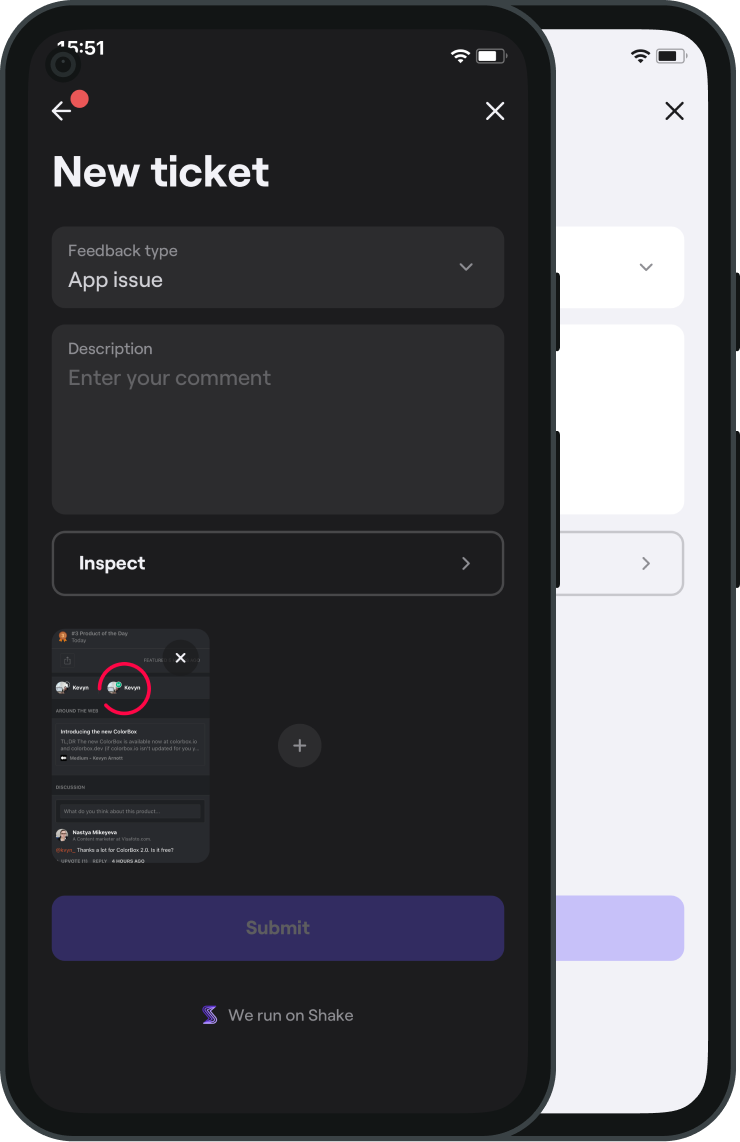
While this screen seems straightforward and allows users to select the issue type and provide a detailed description, things are going on behind the scenes.
Thanks to Shake’s features for automatically attaching relevant bug data—such as environment information, connection details, recordings, screenshots, and more—each bug report arrives with rich context to aid developers.
Additionally, Shake offers powerful automation features with which you can create ticket rules that trigger actions whenever a new bug arrives.
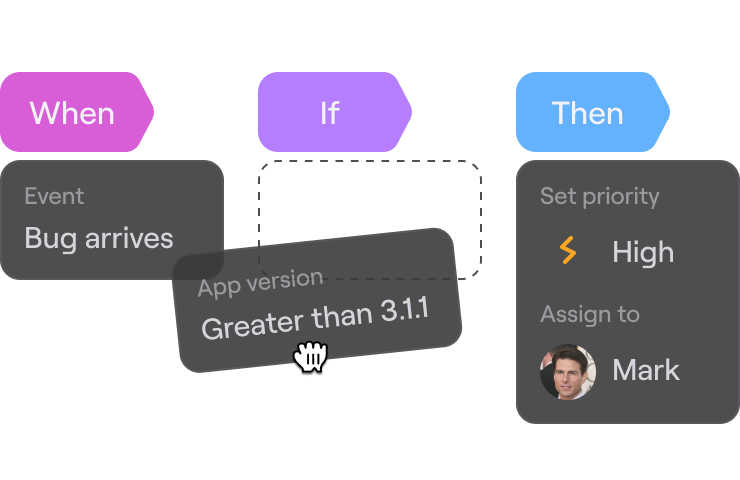
These custom rules can automatically prioritize and assign bug reports based on specific criteria, saving valuable time in the later stages of the bug triage process.
Overall, detailed and, ideally, automated bug reports provide a solid foundation for communication between testers and developers, setting the stage for a collaborative bug triage.
This next stage is arguably the most crucial step within the bug triage process.
After all, not every bug is created equal, and by thoroughly assessing the severity of each bug, you ensure resources are focused on the most critical issues impacting an application.
Let’s first understand how bug severity is determined.
Severity represents the degree to which a bug negatively impacts the user experience or core functionality of the software.
Typically, severity is classified into categories such as Low, Medium, High, and Critical.
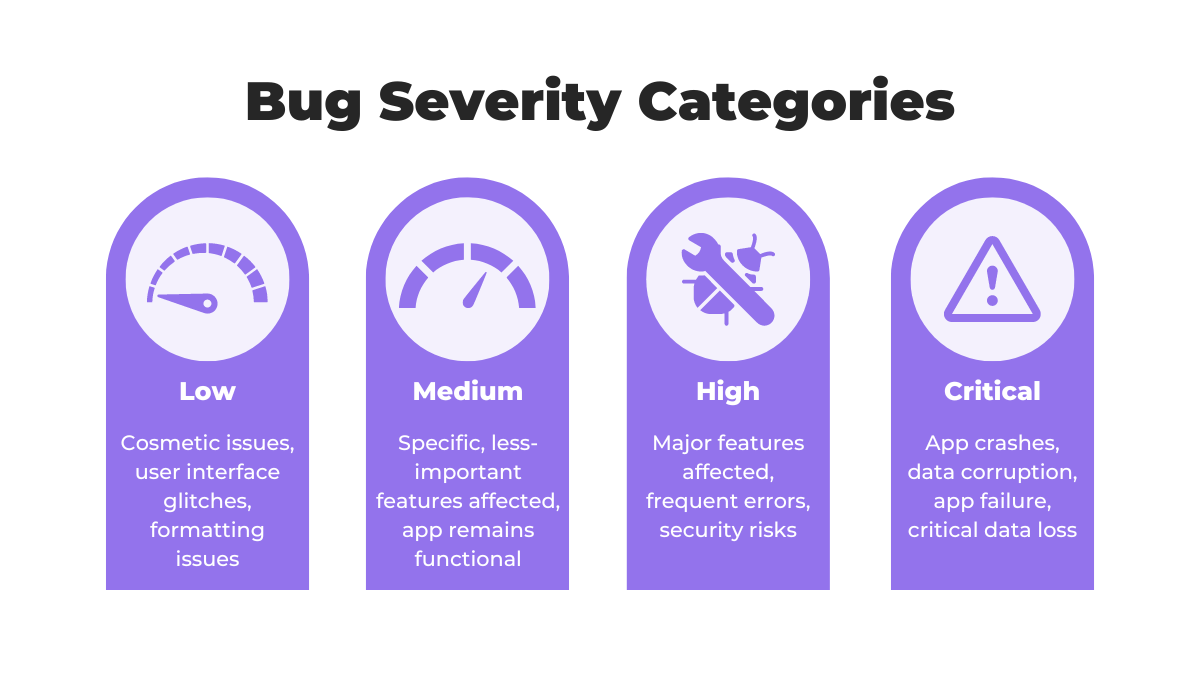
The specific definitions of these categories might vary by organization, but the underlying concept remains the same—to gauge how significantly a bug disrupts the user’s experience or app functionality.
Next, you want to consider the type of bug you’re faced with.
Some common categories include:
Identifying the bug type is important because it helps developers focus their investigation efforts on specific areas of the codebase or the app, leading to faster resolution.
For example, a performance bug might prompt a developer to look closely at optimization techniques, while a usability bug would direct the investigation towards the user interface and user experience.
In addition to severity and bug type, there are other relevant metrics to consider.
These might include bug frequency (how often it occurs), the potential impact on business goals, and the number of users affected.
Ultimately, all of these factors work together to determine the bug’s priority level.
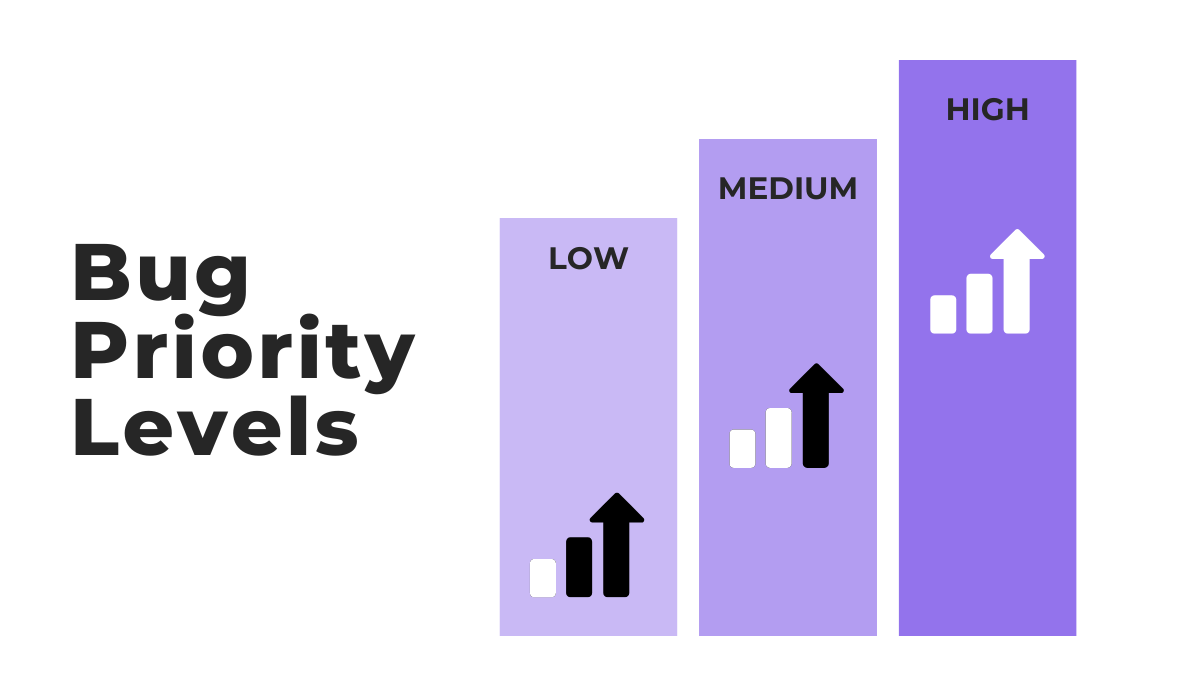
Priority levels often range from high, requiring immediate attention, to medium, all the way to low, which may be fixed in later sprints, or never.
While these categories provide high-level guidance, the precise definitions should align with your development team’s specific priorities and resource availability.
By carefully evaluating bug severity, type, and other relevant metrics, your team can confidently prioritize issues on the backlog.
With our bugs neatly prioritized, the next step in the bug triage journey is assignment.
Thorough bug assignment is crucial for several reasons.
Firstly, it prevents wasted time and delays caused by misdirected debugging efforts and constant reassignments.
Also, effective bug assignment helps teams avoid morale-dampening scenarios where developers need to work on tasks outside their area of expertise.
For this step, robust bug tracking systems come to our aid once again.
Besides allowing direct assignment of bugs within the interface, these tools provide a centralized view of who is currently assigned to what.
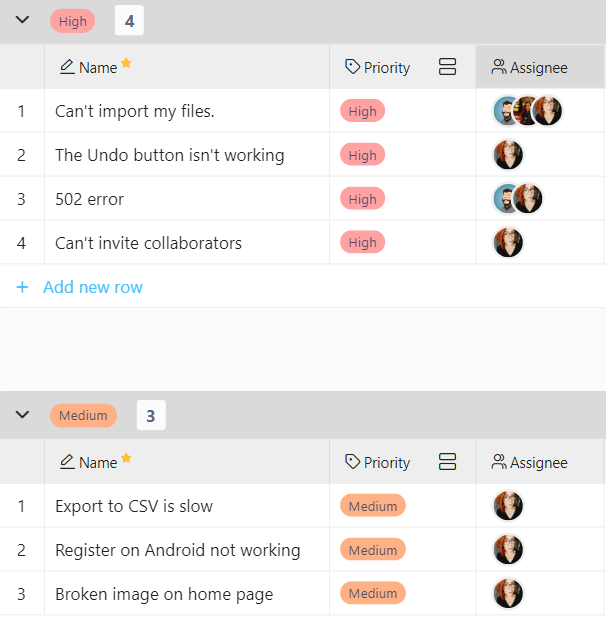
This transparency supports informed decision-making.
For example, project managers or team leads can quickly assess factors such as individual developer workloads, ensuring new bugs aren’t piled onto overwhelmed team members.
More importantly, assignee skills can be factored into finding the ideal match for particularly tricky bugs.
A successful bug assignment isn’t just about finding the right assignee, but also about providing them with the right information to work with.
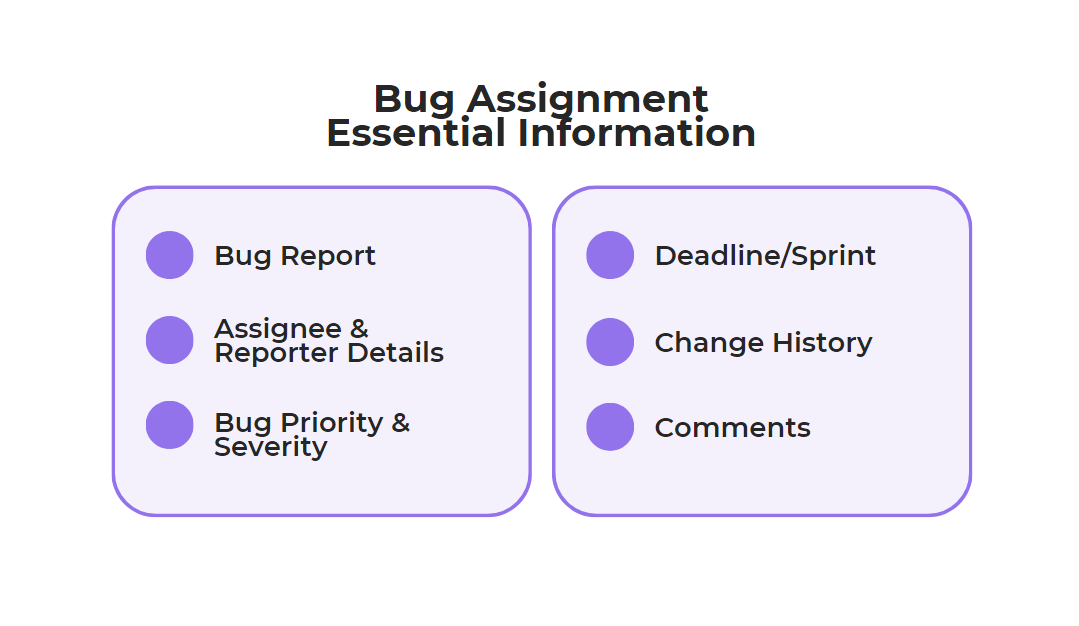
A detailed and accurate bug report is the starting point, but it shouldn’t be the end.
In addition to clearly outlining the problem, priority, and severity, bug assignments should include information about the reporter for follow-up questions, previous assignees (if any), and the relevant team or project area.
A clear deadline or target sprint is also essential to help developers manage their workload and keep the resolution process on track.
When dealing with older bugs, visibility into previous changes and comments left by other team members streamlines the investigation process and avoids redundant work.
As managing bug assignments manually can quickly become a logistical headache, bug triage tools with automation capabilities are our friend here.
Whether you leverage the capabilities of a versatile tool like Shake or prefer the project management features of Jira, you can set up rules for bug assignment with incredible precision.
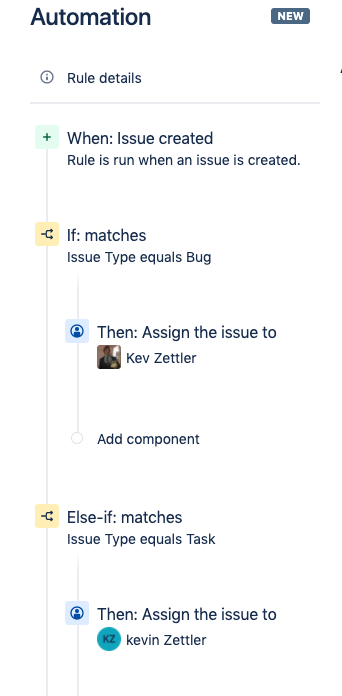
These rules can trigger automatic assignments based on various criteria.
Common examples include assigning bugs of a specific type to specialized developers or routing customer-reported issues to the appropriate support team.
So, carefully assign the right bugs to the right people, as it ensures the most efficient debugging process possible.
Next, we have the documentation of each bug in the triage process, which lays the foundation for efficient resolution and future prevention.
Bug documentation should capture a variety of elements, including some key items illustrated below.
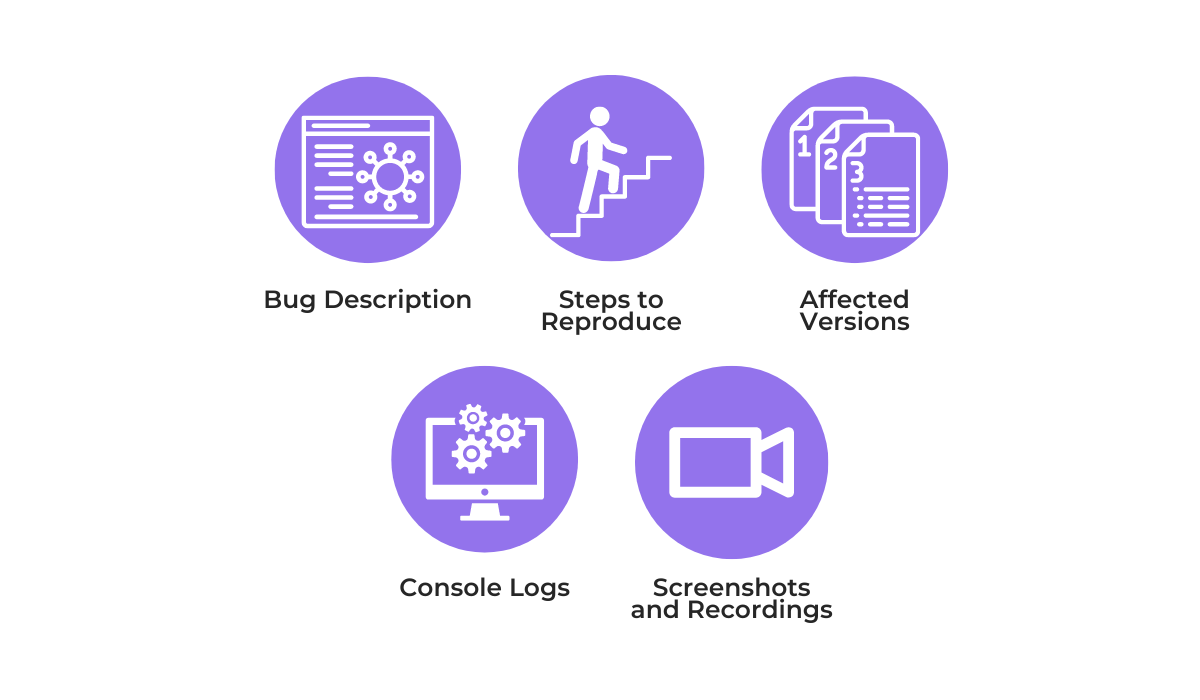
Essentially, this data provides developers with the context they need to reproduce the issue consistently and better identify its root cause.
Take console logs as an example.
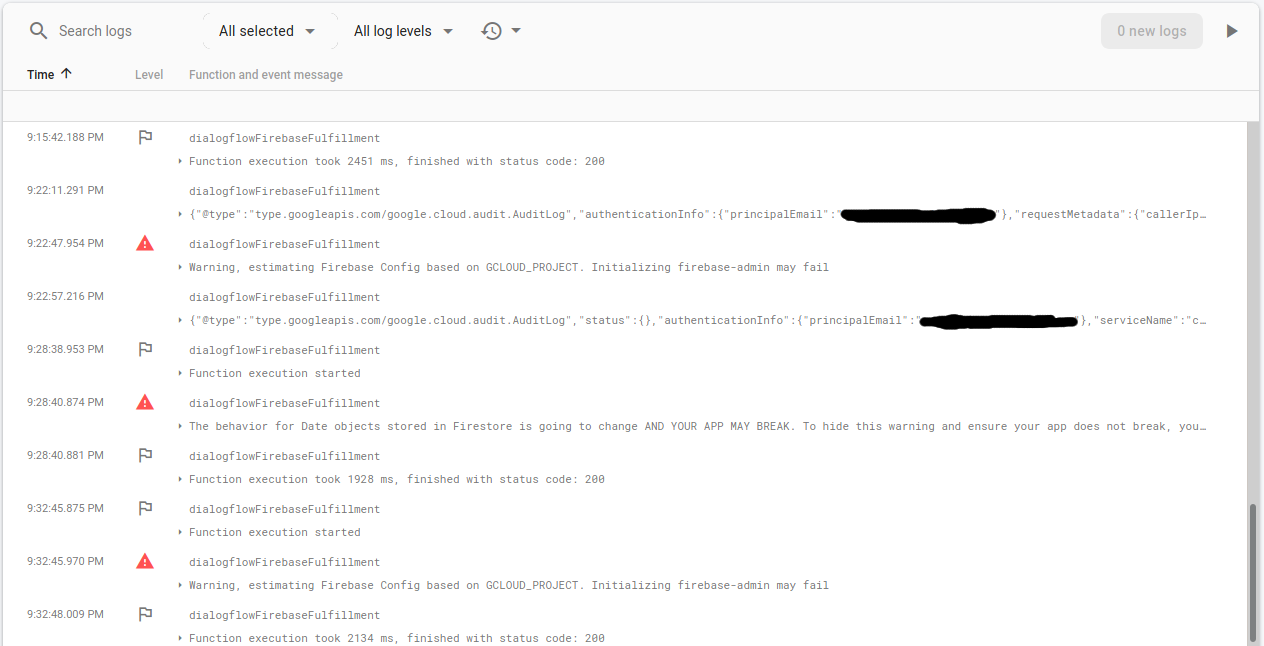
These logs capture application events, errors, and activity during runtime.
By analyzing these logs, developers can track down unexpected behavior, identify anomalies, and retrace the steps that led to a bug.
And while these logs can give written clues to a defect, screenshots and recordings can visually capture the exact moment when a bug manifests itself, thereby supplementing the log data.
Finally, there’s meticulous documentation of how the steps to reproduce a bug are non-negotiable.
After all, only when developers can replicate the issue at hand can they properly start figuring it out.
And, as the Quora user below puts it, reliable reproduction steps become the ultimate test once a bug fix is implemented.
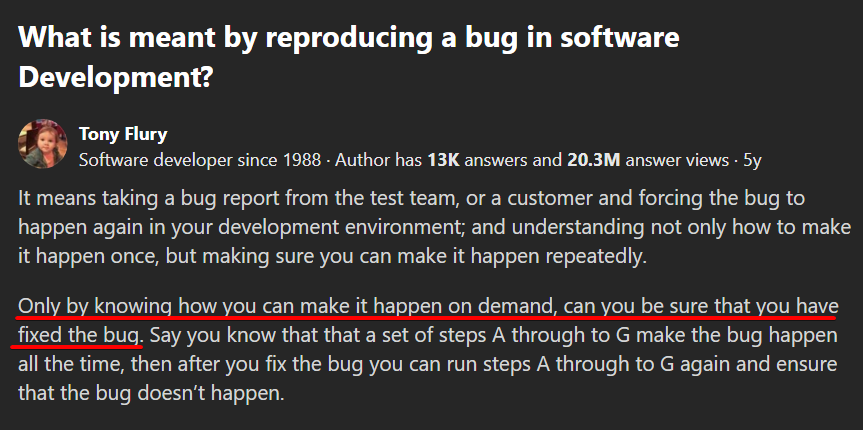
Imagine implementing a fix that seemingly resolves an issue, only to have the bug reappear later because the true cause wasn’t addressed.
Without reliable reproduction steps, validating whether a fix is truly effective becomes nearly impossible.
But, by documenting each bug and all the relevant contextual information, you avoid these scenarios and empower your development team to resolve issues efficiently.
Capture, Annotate & Share in Seconds with our Free Chrome Extension!
As bug triage draws to a close, it’s time to create a strategic plan for eliminating those troublesome bugs for good.
This plan isn’t just about the immediate bug fixes.
Rather, it encompasses the entire process of ensuring that the bug is eliminated and that safeguards are in place to minimize the risk of it popping back up.
The first step in creating a resolution plan is identifying the area within the software that should be targeted.
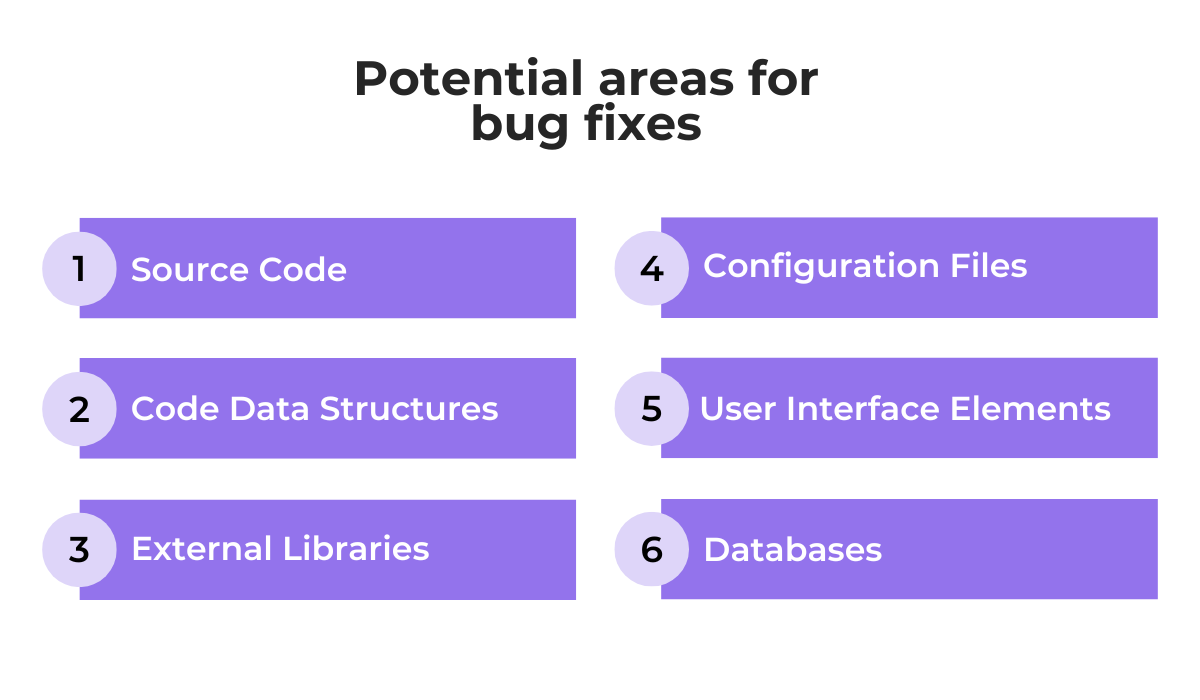
Different causes will guide the fix.
For example, if a bug’s root cause lies within the source code, the resolution will focus on modifying the application’s logic or internal structure.
If a bug came from a problematic external library or dependency, the approach might involve updating the library, and so on.
Another vital aspect of the resolution plan is the testing strategy.
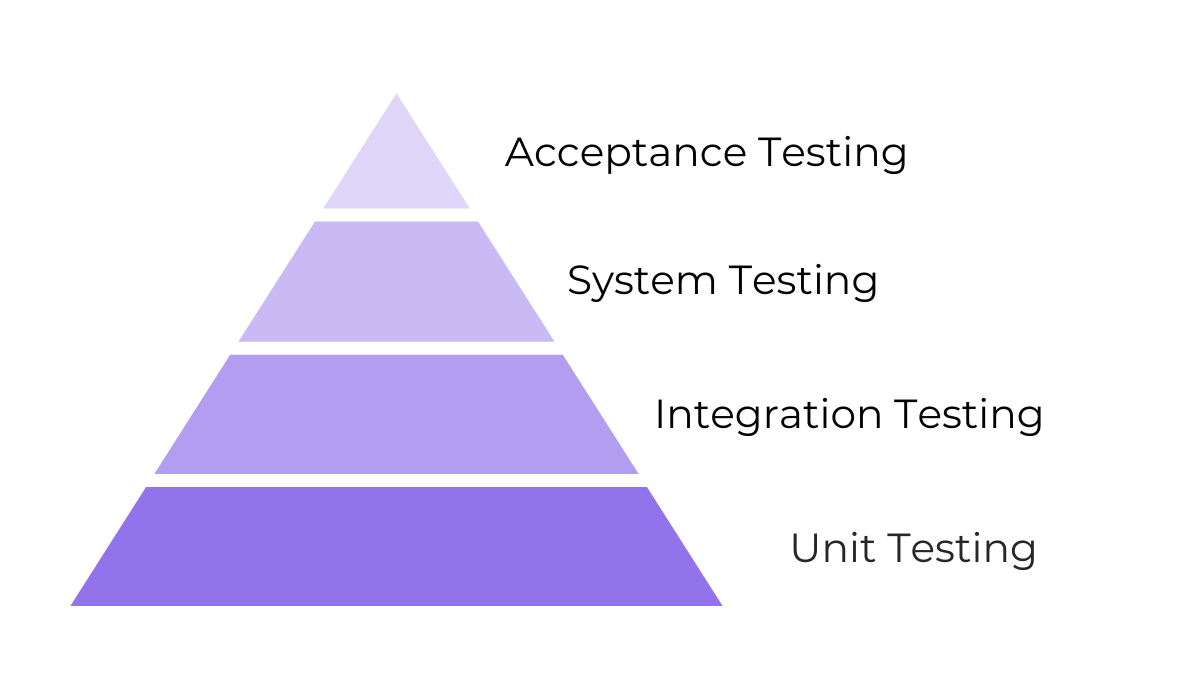
Different bug types call for different testing methods, whether it’s unit tests for isolating issues within small code sections, integration tests for testing how components work together, or acceptance testing involving stakeholders or users confirming the fix is satisfactory.
Choosing the right combination of tests is essential during triage, as the right testing strategy can ensure that the initial bug is fixed and that the fix itself doesn’t introduce new problems.
But, even with careful planning and execution, complex bug fixes carry the risk of unintended consequences.
That’s why it’s wise to consider how deployment strategies can support your overall resolution plan.
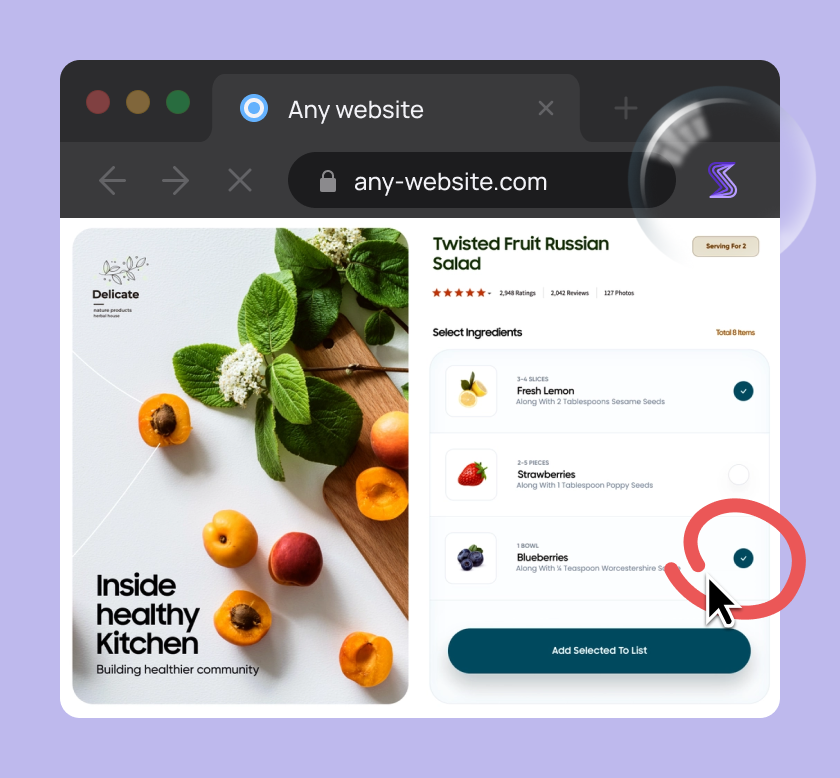
One option is a staged rollout of the update containing the fix.
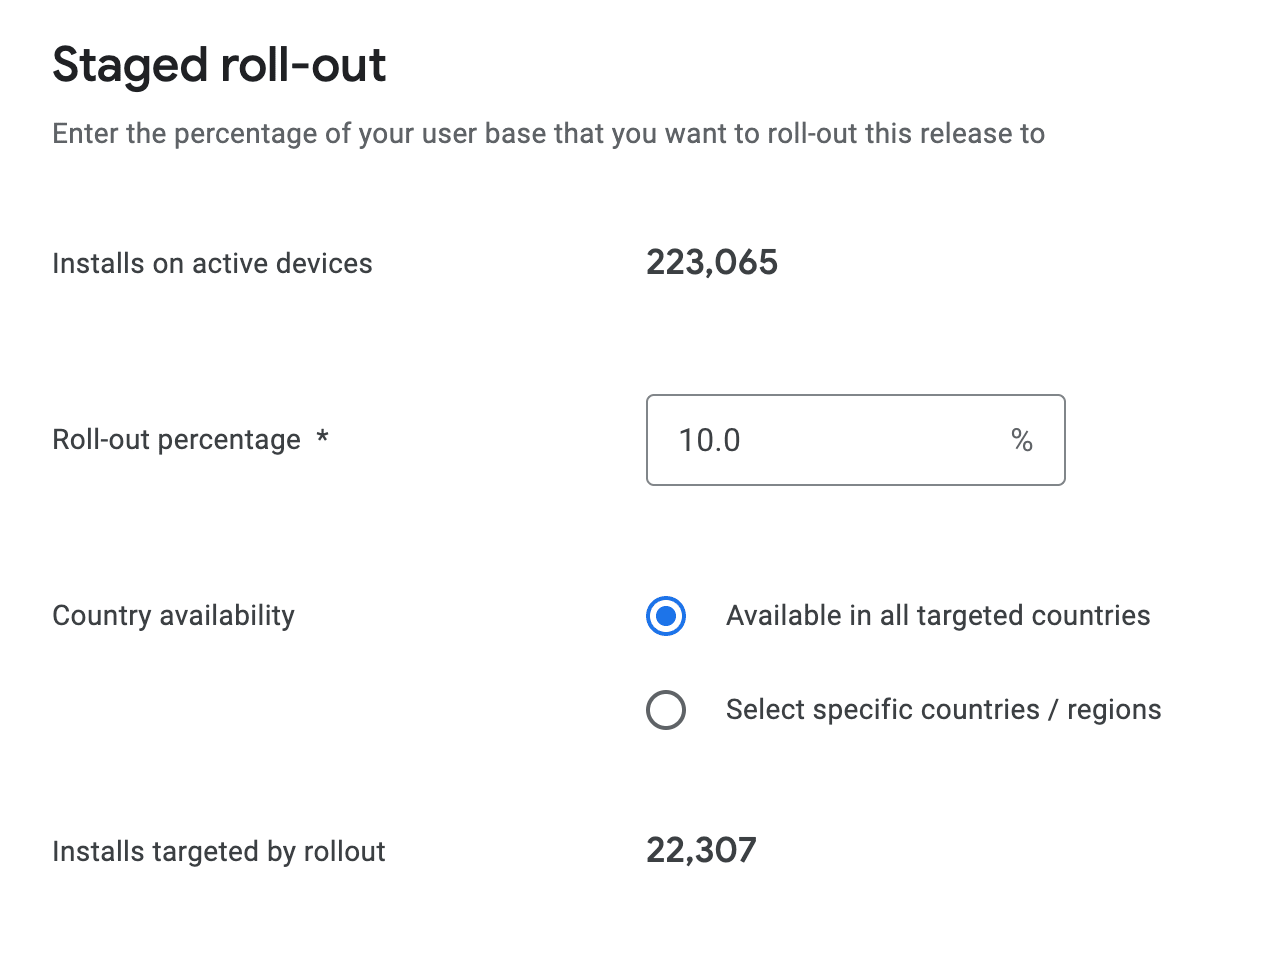
This involves gradually releasing the update to a limited subset of users, like 10% of users as in the example above, before deploying it to your entire user base.
By monitoring for issues within this smaller group, you can catch potential new bugs early and minimize the impact if any arise.
All in all, with a well-rounded resolution plan that considers the bug’s root cause, testing procedures, and deployment strategies, the bug triage process is done.
And there we have it, the six main steps of bug triage.
By understanding this process in detail, you essentially gain a powerful tool for managing bugs and keeping your development on track.
A well-defined and organized triage means you’ll be able to prioritize bugs confidently, assign them to the right people, and resolve the defects more efficiently, thereby reducing risk and ultimately delivering higher-quality software.
And remember, bug triage is an ongoing process.
So, stay flexible, track your results, and adjust your approach for maximum efficiency.
With a little practice, you’ll be well on your way to streamlined issue management and a successful app.
From internal bug reporting to production and customer support, our all-in-one SDK gets you all the right clues to fix issues in your mobile app and website.
We love to think it makes CTOs life easier, QA tester’s reports better and dev’s coding faster. If you agree that user feedback is key – Shake is your door lock.
Read more about us here.

Add to app in minutes

Doesn’t affect app speed

GDPR & CCPA compliant

Unexpected things pop up
Just like bugs in your app or web 🐛 Fix them now with just one reporting tool.